How to Create a New Static Site on Render via API
In this tutorial, we are going to create a static site on Render using its API. We'll send a JSON request from the terminal, check the deploy, and open the finished website.
This is useful when you want a script to create services, instead of filling out the same form each time. Render calls this service type a Static Site, and the API value is static_site.
Prepare a small website
Create a GitHub repository with an index.html file at the root. Here is a small page you can use:
<!doctype html>
<html lang="en">
  <head>
    <meta charset="utf-8" />
    <meta name="viewport" content="width=device-width, initial-scale=1" />
    <title>Static site created with the Render API</title>
    <style>
      body { max-width: 720px; margin: 80px auto; padding: 0 24px;
        font-family: system-ui, sans-serif; line-height: 1.6; }
      h1 { line-height: 1.2; }
    </style>
  </head>
  <body>
    <h1>Hello from a Render static site</h1>
    <p>This site was created with the Render API.</p>
  </body>
</html>
Commit the file and push it to your repository. The example below assumes your branch is main. Change that value if you use a different branch.
A static site serves built files; it does not run an API server. Render's static-site docs explain the hosting model and usage allowances. There is no web-service compute plan in this request, but builds and bandwidth still count toward your workspace's limits.
Get an API key and workspace ID
You will need a Render account, a GitHub repository, curl, and jq. The commands below use Bash.
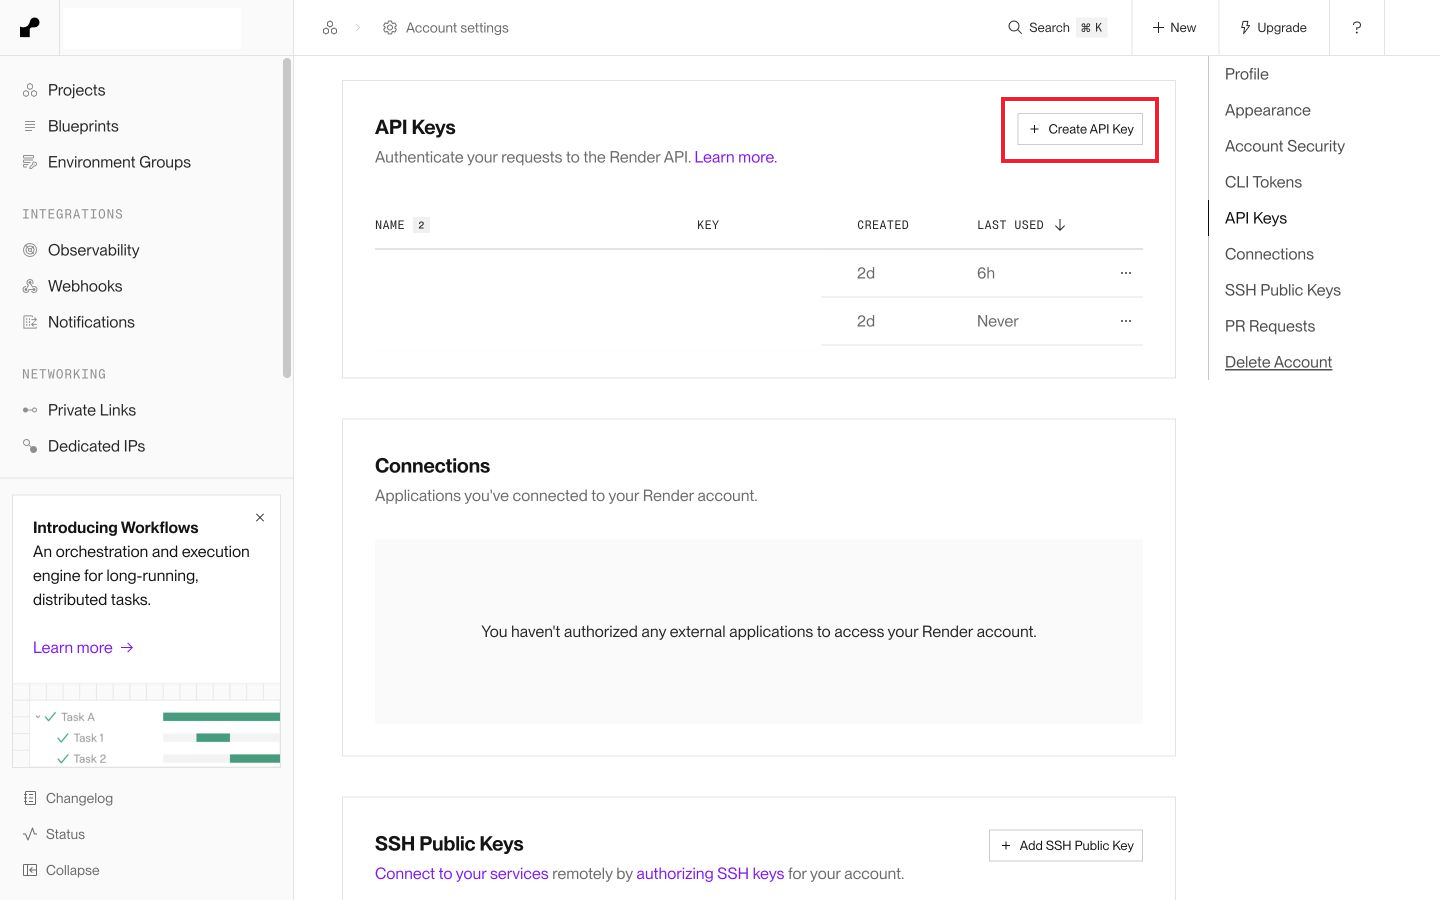
In Render, open the account menu in the top-right corner, then Account settings. Scroll to API Keys and hit Create API Key. Give it a name that tells you what it is for, then copy the key when Render shows it. Keep it private.
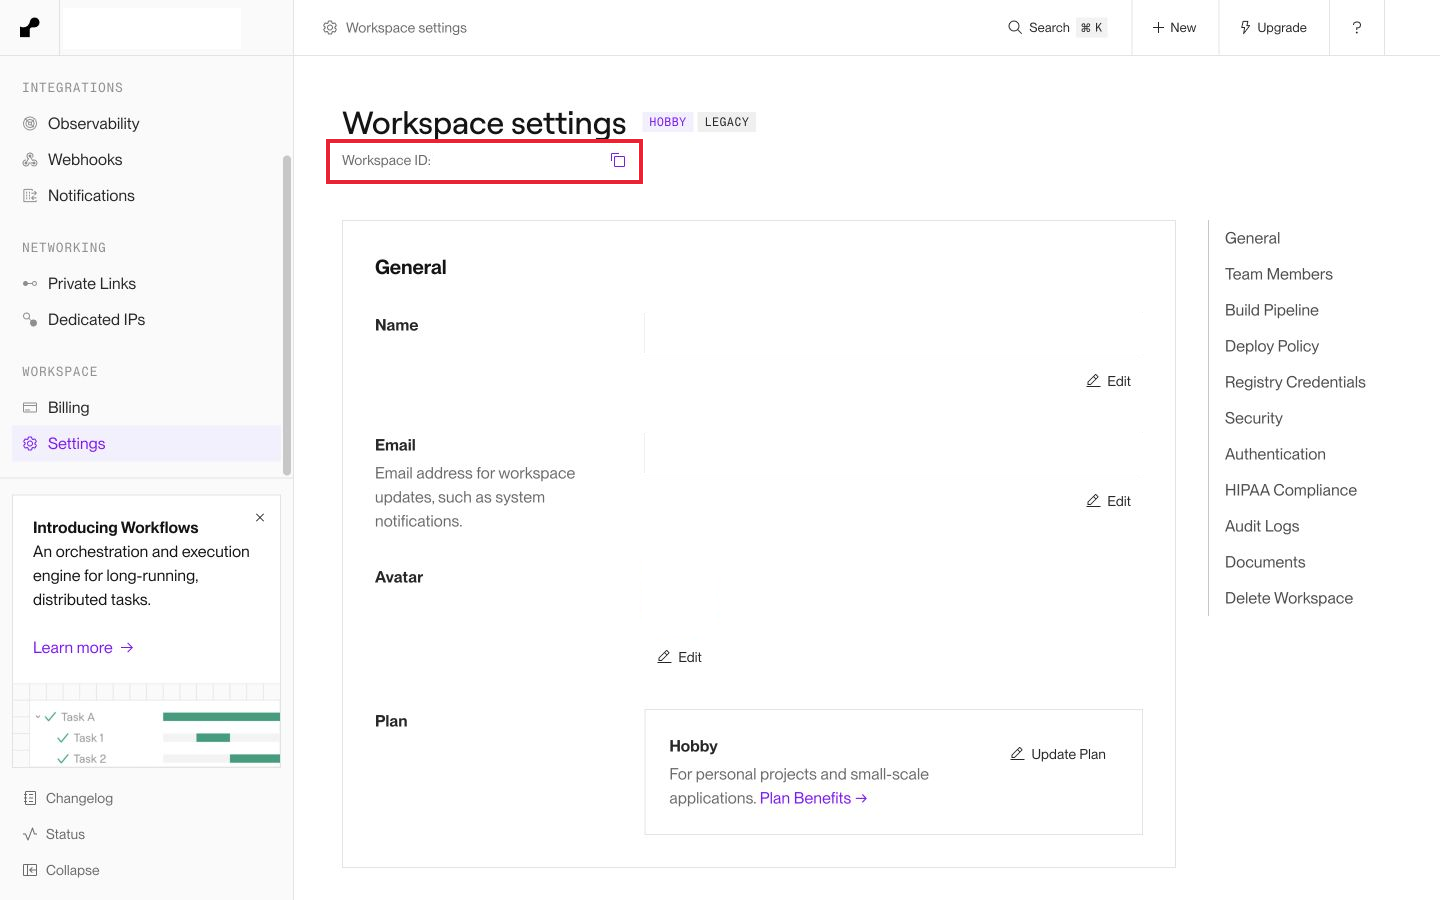
Open your workspace's Settings page and copy the Workspace ID near the top. This becomes ownerId in the API request. It is separate from the API key.
In your terminal, read the key without echoing it. Paste it at the prompt and press Enter:
printf 'Render API key: '
read -r -s RENDER_API_KEY
printf '\n'
export RENDER_API_KEY
export RENDER_OWNER_ID='tea_REPLACE_WITH_YOUR_WORKSPACE_ID'
export GITHUB_REPO='https://github.com/YOUR_USERNAME/YOUR_REPOSITORY'
Replace the workspace ID and repository URL. Do not put the key in a JSON file or commit it to GitHub. See Render's API setup guide for authentication details.
For a private repository, connect your GitHub account to Render and grant access to that repository first. An API key does not replace GitHub repository access. Use the repository URL alone; the branch is a separate field.
Build the request body
Create static-site.json with jq. It substitutes your workspace ID and repo URL into valid JSON:
jq -n \
  --arg owner "$RENDER_OWNER_ID" \
  --arg repo "$GITHUB_REPO" \
  '{
    type: "static_site",
    name: "static-site-api-tutorial",
    ownerId: $owner,
    repo: $repo,
    branch: "main",
    autoDeployTrigger: "off",
    serviceDetails: {
      buildCommand: "mkdir -p dist && cp index.html dist/index.html",
      publishPath: "dist"
    }
  }' > static-site.json
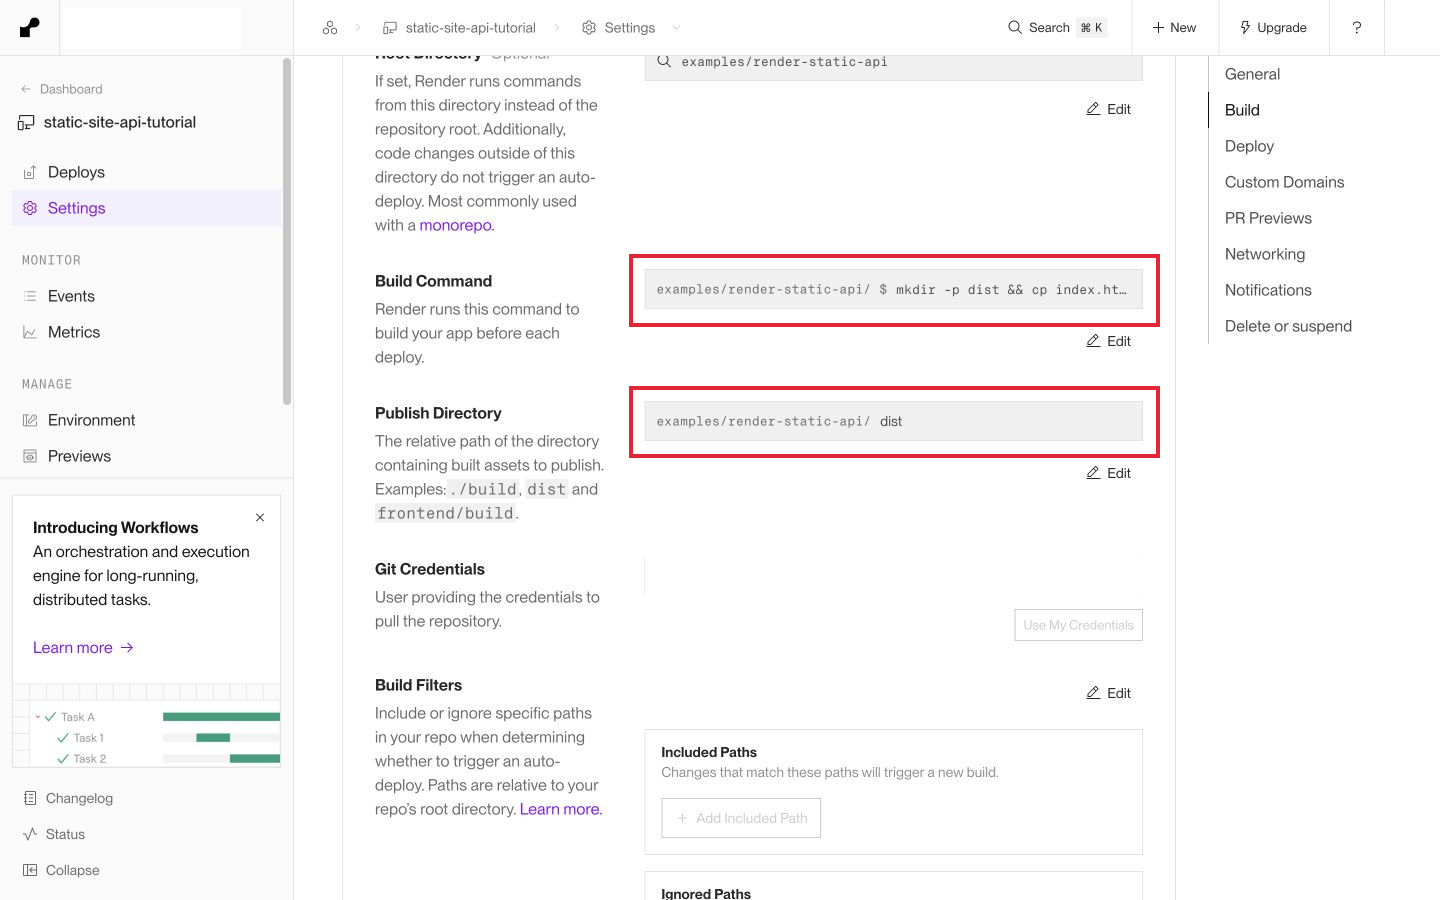
The build command copies our HTML into dist. publishPath tells Render to serve that directory. There is no start command because there is no server process to start.
I set autoDeployTrigger to off for this disposable example. The first deploy still runs when the service is created; later commits will not automatically redeploy it. Use commit if you want that behavior. Use this current field rather than the older, deprecated autoDeploy field.
My test files are in examples/render-static-api inside a larger repository. For that layout, I also sent the top-level field "rootDir": "examples/render-static-api" and used the codex/render-provisioning-examples branch. Paths in the build command and publishPath are relative to that root. Leave rootDir out when index.html is at the repository root.
Send the create request
Use Create service to send the JSON file. This request creates a real service and starts its first deploy:
curl --fail-with-body --silent --show-error \
  --request POST 'https://api.render.com/v1/services' \
  --header "Authorization: Bearer $RENDER_API_KEY" \
  --header 'Accept: application/json' \
  --header 'Content-Type: application/json' \
  --data-binary @static-site.json \
  --output create-response.json \
  --write-out 'HTTP %{http_code}\n'
My request returned HTTP 201. If yours fails, inspect create-response.json for the error before continuing. For 401, check the bearer key. For a repository access error, check the GitHub connection and repo URL. A 429 means you need to wait before retrying. Do not keep repeating the POST when you are unsure whether it succeeded; check the dashboard first, so you do not create extra services.
The successful response contains a service object and a deployId. Extract the values we need:
SERVICE_ID=$(jq -er '.service.id' create-response.json)
DEPLOY_ID=$(jq -er '.deployId' create-response.json)
SERVICE_URL=$(jq -er '.service.serviceDetails.url' create-response.json)
printf 'Service: %s\nDeploy: %s\nURL: %s\n' \
  "$SERVICE_ID" "$DEPLOY_ID" "$SERVICE_URL"
A 201 means Render created the service. It does not mean the app has finished deploying.
Wait for the deploy
Check that specific deploy with Retrieve deploy:
curl --fail-with-body --silent --show-error \
  "https://api.render.com/v1/services/$SERVICE_ID/deploys/$DEPLOY_ID" \
  --header "Authorization: Bearer $RENDER_API_KEY" \
  --header 'Accept: application/json' \
  | jq '{id, status}'
Run the GET again after a short wait if it is still building. You want status to become live. If it reports build_failed, update_failed, or another failure, open the deploy in the dashboard and read the logs. A successful create request can still be followed by a failed build.
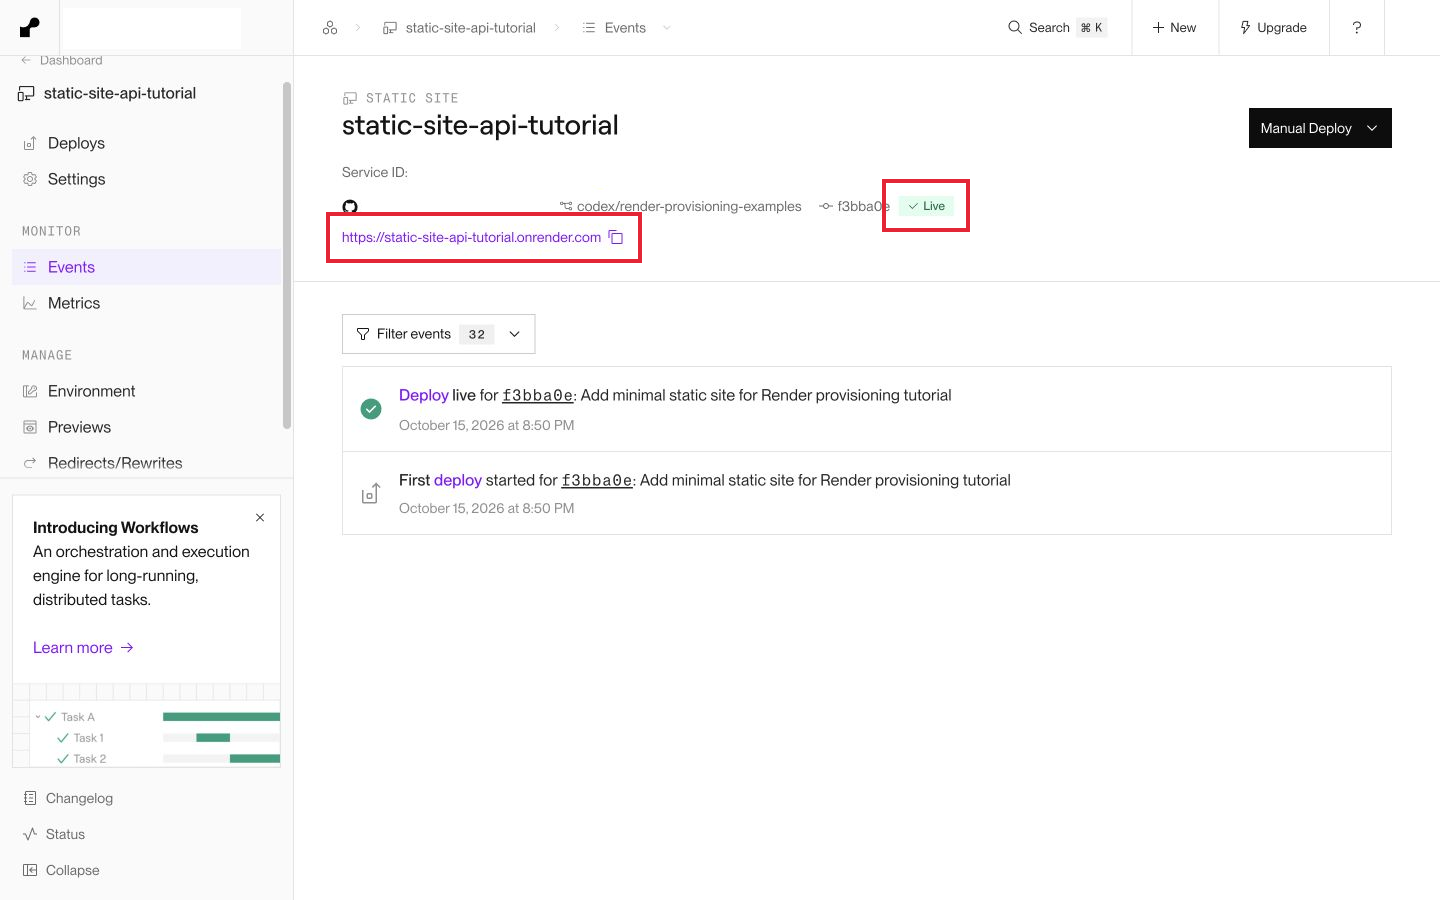
You can also watch it in the Render dashboard. The site I created through the API appears there like a site created through the form:
Under Settings, check the root directory, build command, and publish directory. The dashboard calls the API's publishPath field Publish Directory.
Open the website
Once the deploy is live, open the URL from SERVICE_URL. You can check the response from the terminal too:
curl --fail --silent --show-error "$SERVICE_URL"
You should see the HTML from index.html. I also opened the URL in a browser to confirm the page renders:
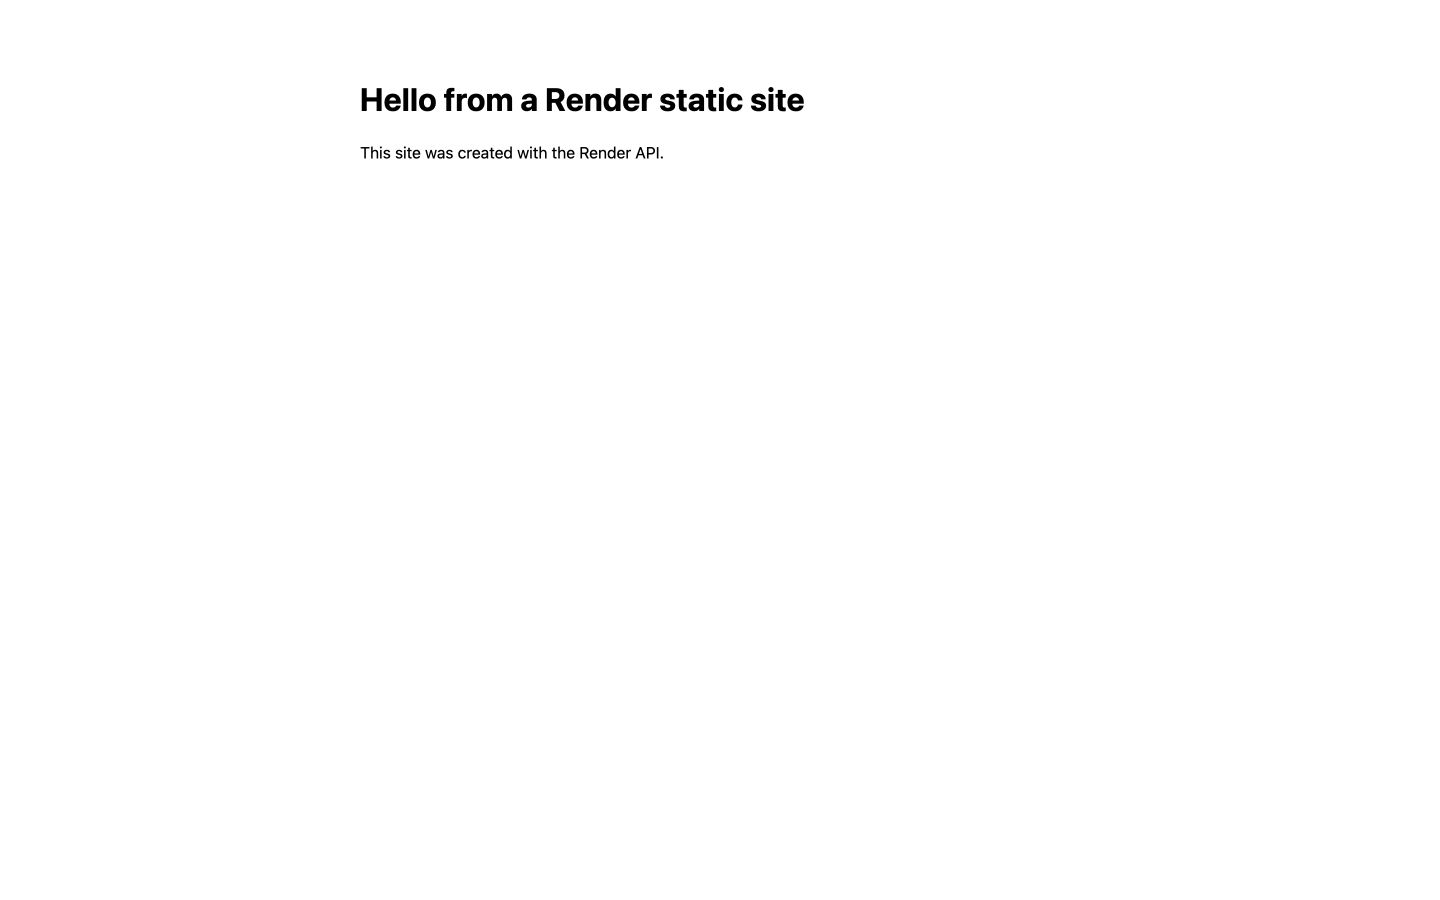
If you get a 404, check that dist/index.html exists after the build and that publishPath is dist. If the build cannot find index.html, check the selected branch and root directory. For a React or other generated site, use its actual build command and output directory instead of copying this example's HTML command.
Clean up the test service
If you are only following along, delete the tutorial service when you are done. Check the ID before running this command; it permanently removes that service:
printf 'Deleting tutorial service %s\n' "$SERVICE_ID"
curl --fail-with-body --silent --show-error \
  --request DELETE "https://api.render.com/v1/services/$SERVICE_ID" \
  --header "Authorization: Bearer $RENDER_API_KEY" \
  --write-out 'HTTP %{http_code}\n'
The delete endpoint returns 204 on success. I removed my test service after verifying the deploy. Remove the key from your shell when you finish:
unset RENDER_API_KEY
If you created a key just for this tutorial, revoke it in Account settings as well. Add the generated request and response JSON files to .gitignore; they contain your account and service details even though the bearer token is not in them.
That's it! You can now create a new Render static site from a script, keep track of the service ID, and check when its first deploy is ready.