How to Create a New Web Service on Render via API
In this tutorial, we are going to create a new web service on Render using its API. We'll deploy a small Node.js app, check the deploy status, and test the public URL.
The same create endpoint works for other native runtimes and Docker. The settings inside serviceDetails change with the type of app you are deploying. We'll keep this example small so it is easy to see what the request does.
Prepare the app
If you followed How to deploy a Node.js API on Render, you can use that same app. Otherwise, create a GitHub repository with these two files at its root.
Create package.json:
{
  "name": "render-node-api",
  "version": "1.0.0",
  "private": true,
  "type": "module",
  "engines": {
    "node": "24.x"
  },
  "scripts": {
    "start": "node server.js"
  }
}
Create server.js:
import http from "node:http";

const port = Number(process.env.PORT || 10000);
const server = http.createServer((request, response) => {
  const path = new URL(request.url, "http://localhost").pathname;
  response.setHeader("Content-Type", "application/json");
  if (request.method !== "GET" && request.method !== "HEAD") {
    response.writeHead(405, { Allow: "GET, HEAD" });
    response.end(JSON.stringify({ error: "Method not allowed" }));
    return;
  }
  if (path === "/healthz") {
    response.end(JSON.stringify({ status: "ok" }));
    return;
  }
  if (path === "/") {
    response.end(JSON.stringify({ message: "Hello from Node.js" }));
    return;
  }
  response.writeHead(404);
  response.end(JSON.stringify({ error: "Not found" }));
});
server.listen(port, "0.0.0.0", () => {
  console.log(`Listening on 0.0.0.0:${port}`);
});
Run npm install to generate package-lock.json, then test it with npm start. The app reads Render's PORT environment variable and listens on 0.0.0.0. Commit all three files and push them to GitHub. Add node_modules/ and .env to .gitignore.
The request below assumes a main branch. Change it to match your repository. We will select Free compute explicitly. Check Render's Free plan limits if you need a service that stays available; a Free web service spins down with inactivity and has a temporary filesystem.
Get an API key and workspace ID
You will need a Render account, a GitHub repository, curl, and jq. The commands below use Bash.
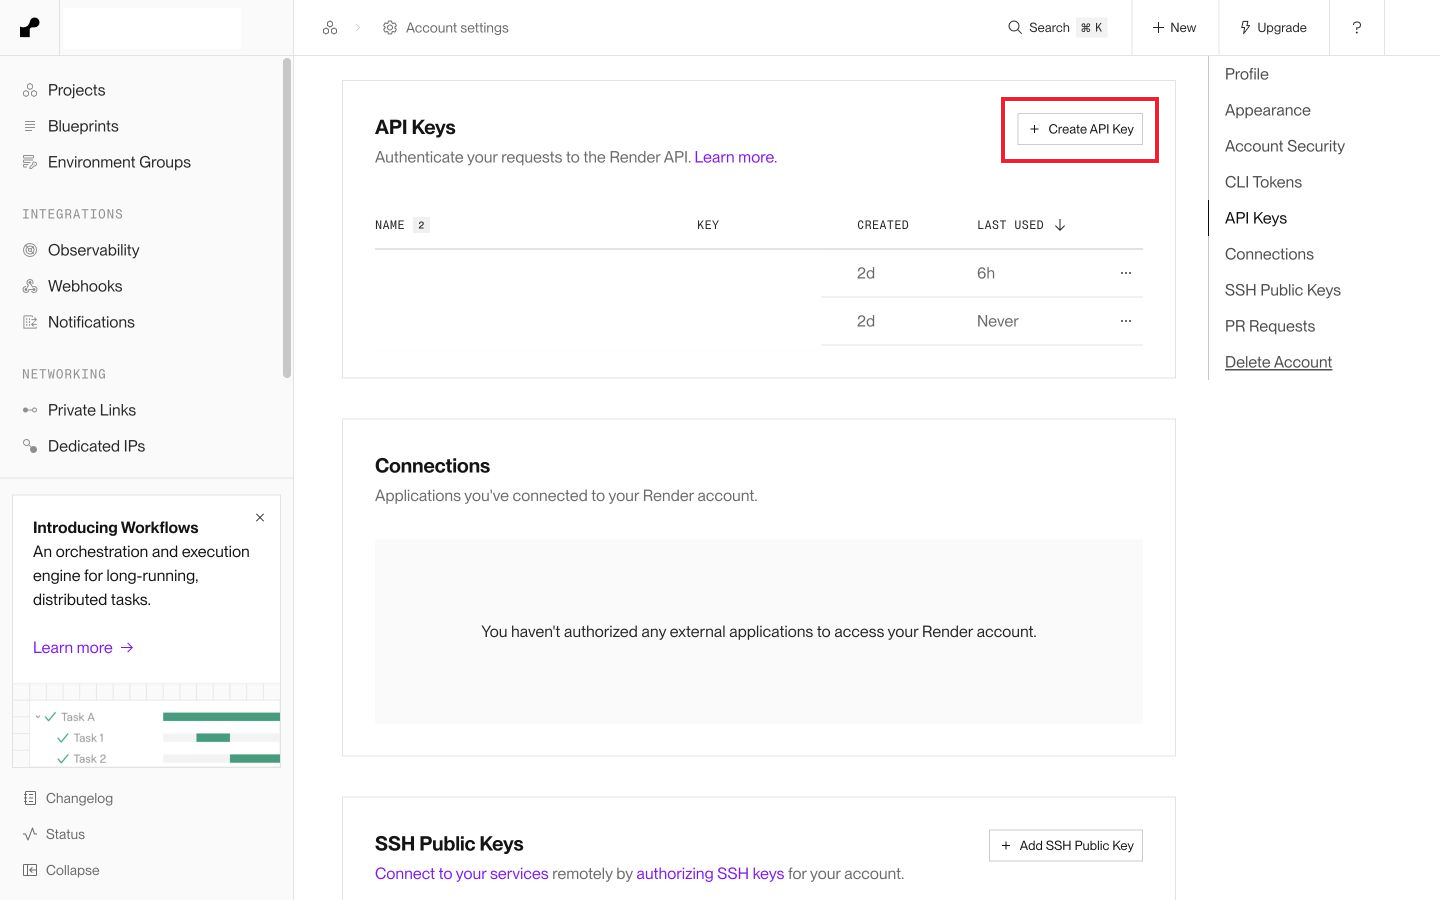
In Render, open the account menu in the top-right corner, then Account settings. Scroll to API Keys and hit Create API Key. Give it a name that tells you what it is for, then copy the key when Render shows it. Keep it private.
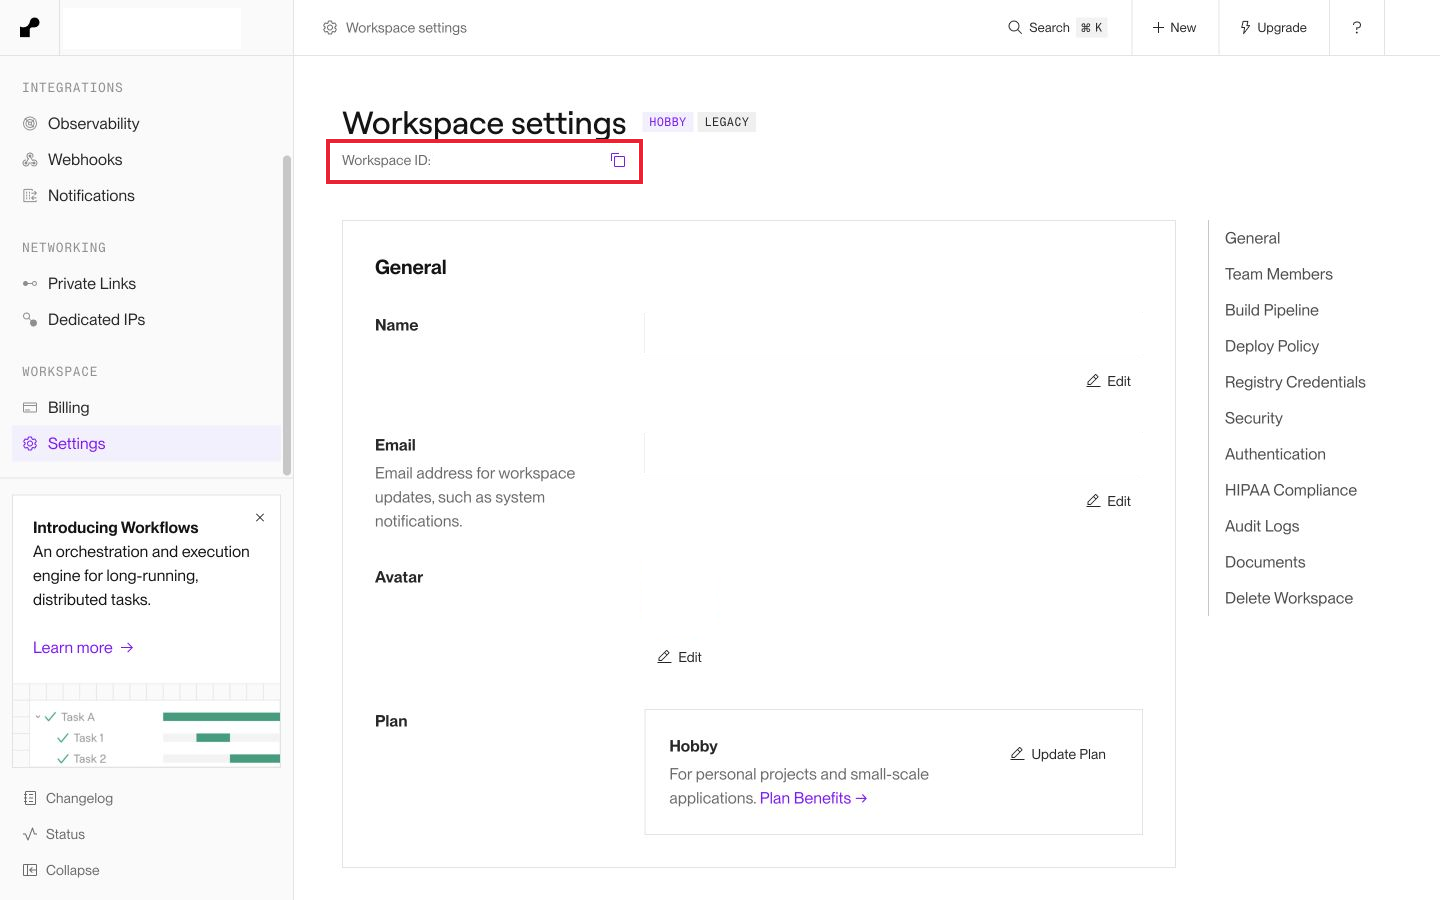
Open your workspace's Settings page and copy the Workspace ID near the top. This becomes ownerId in the API request. It is separate from the API key.
In your terminal, read the key without echoing it. Paste it at the prompt and press Enter:
printf 'Render API key: '
read -r -s RENDER_API_KEY
printf '\n'
export RENDER_API_KEY
export RENDER_OWNER_ID='tea_REPLACE_WITH_YOUR_WORKSPACE_ID'
export GITHUB_REPO='https://github.com/YOUR_USERNAME/YOUR_REPOSITORY'
Replace the workspace ID and repository URL. Do not put the key in a JSON file or commit it to GitHub. See Render's API setup guide for authentication details.
For a private repository, connect your GitHub account to Render and grant access to that repository first. An API key does not replace GitHub repository access. Use the repository URL alone; the branch is a separate field.
Build the request body
Create web-service.json:
jq -n \
  --arg owner "$RENDER_OWNER_ID" \
  --arg repo "$GITHUB_REPO" \
  '{
    type: "web_service",
    name: "web-service-api-tutorial",
    ownerId: $owner,
    repo: $repo,
    branch: "main",
    autoDeployTrigger: "off",
    envVars: [
      {key: "NODE_VERSION", value: "24.21.0"}
    ],
    serviceDetails: {
      runtime: "node",
      plan: "free",
      region: "oregon",
      envSpecificDetails: {
        buildCommand: "npm ci",
        startCommand: "npm start"
      },
      healthCheckPath: "/healthz"
    }
  }' > web-service.json
Keep plan: "free" in the request if you are following this Free example. The API currently defaults to paid compute when you leave the plan out. Do not rely on the dashboard's last selection.
runtime selects Node. The build and start commands go inside envSpecificDetails, which is nested inside serviceDetails. npm ci needs the committed lockfile, and npm start runs the script in package.json. The health check points at the route our app serves.
envVars is top-level. Here it only pins the Node version; the Render bearer token belongs in the HTTP authorization header, never in your app's environment. I used Node 24.21.0 for the test; see Render's Node version settings when choosing a version for your own app.
I set autoDeployTrigger to off so later commits do not redeploy this test service. Its first deploy still starts when we create it. Change it to commit if you want automatic deploys on new commits.
My example lives in examples/render-node-api on the codex/render-provisioning-examples branch. I added the top-level field "rootDir": "examples/render-node-api" for that layout. Omit rootDir when your files are at the repository root.
Send the create request
Use Create service to send the JSON file. This request creates a real service and starts its first deploy:
curl --fail-with-body --silent --show-error \
  --request POST 'https://api.render.com/v1/services' \
  --header "Authorization: Bearer $RENDER_API_KEY" \
  --header 'Accept: application/json' \
  --header 'Content-Type: application/json' \
  --data-binary @web-service.json \
  --output create-response.json \
  --write-out 'HTTP %{http_code}\n'
My request returned HTTP 201. If yours fails, inspect create-response.json for the error before continuing. For 401, check the bearer key. For a repository access error, check the GitHub connection and repo URL. A 429 means you need to wait before retrying. Do not keep repeating the POST when you are unsure whether it succeeded; check the dashboard first, so you do not create extra services.
The successful response contains a service object and a deployId. Extract the values we need:
SERVICE_ID=$(jq -er '.service.id' create-response.json)
DEPLOY_ID=$(jq -er '.deployId' create-response.json)
SERVICE_URL=$(jq -er '.service.serviceDetails.url' create-response.json)
printf 'Service: %s\nDeploy: %s\nURL: %s\n' \
  "$SERVICE_ID" "$DEPLOY_ID" "$SERVICE_URL"
A 201 means Render created the service. It does not mean the app has finished deploying.
Wait for the deploy
Check that specific deploy with Retrieve deploy:
curl --fail-with-body --silent --show-error \
  "https://api.render.com/v1/services/$SERVICE_ID/deploys/$DEPLOY_ID" \
  --header "Authorization: Bearer $RENDER_API_KEY" \
  --header 'Accept: application/json' \
  | jq '{id, status}'
Run the GET again after a short wait if it is still building. You want status to become live. If it reports build_failed, update_failed, or another failure, open the deploy in the dashboard and read the logs. A successful create request can still be followed by a failed build.
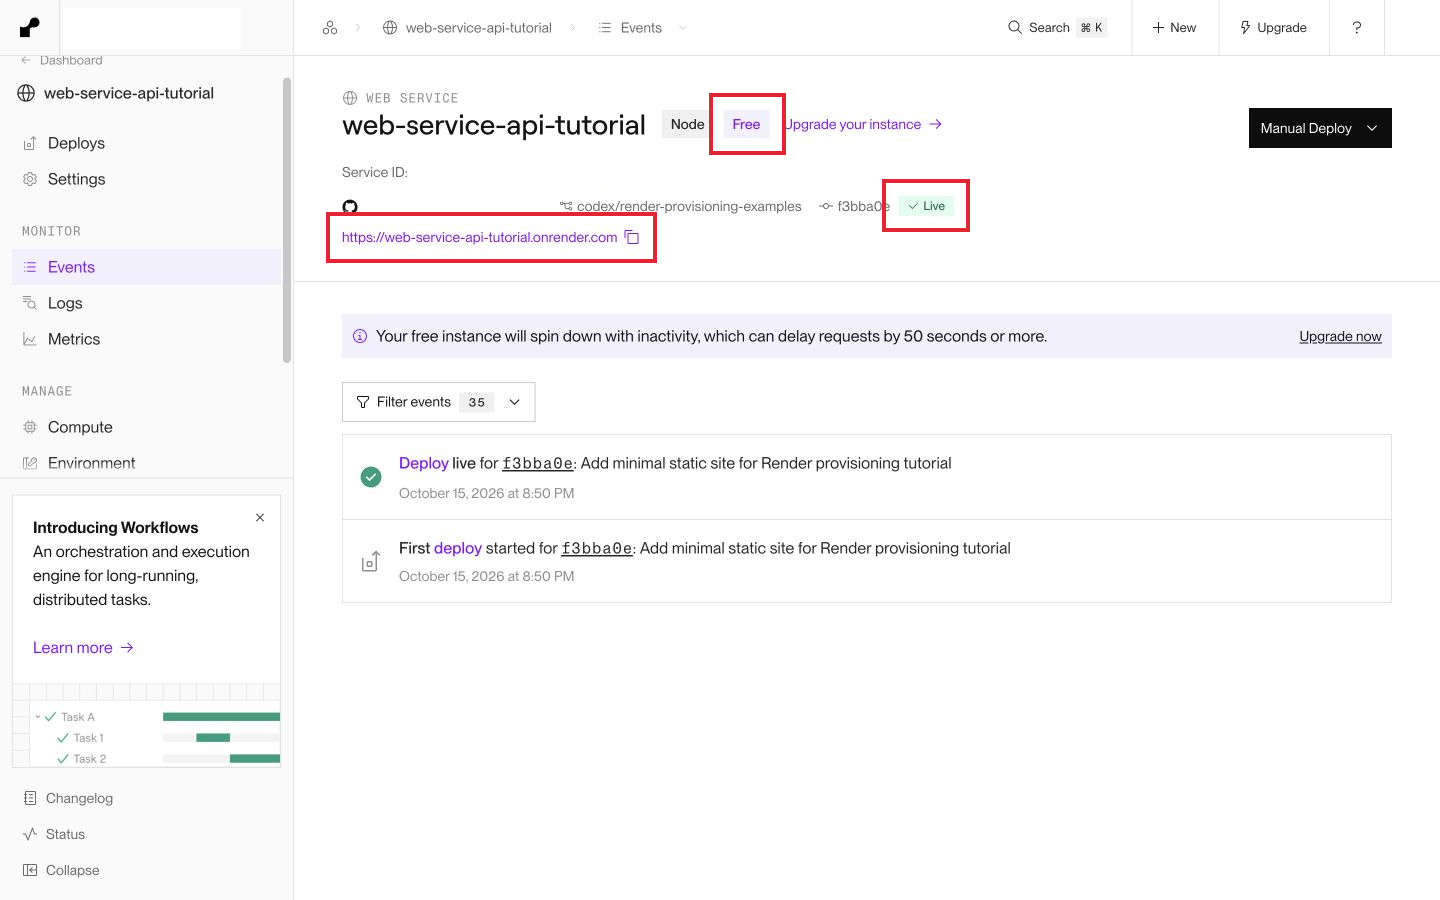
You can also watch the service in the dashboard. Mine showed Node, Free, and Live after the first deploy:
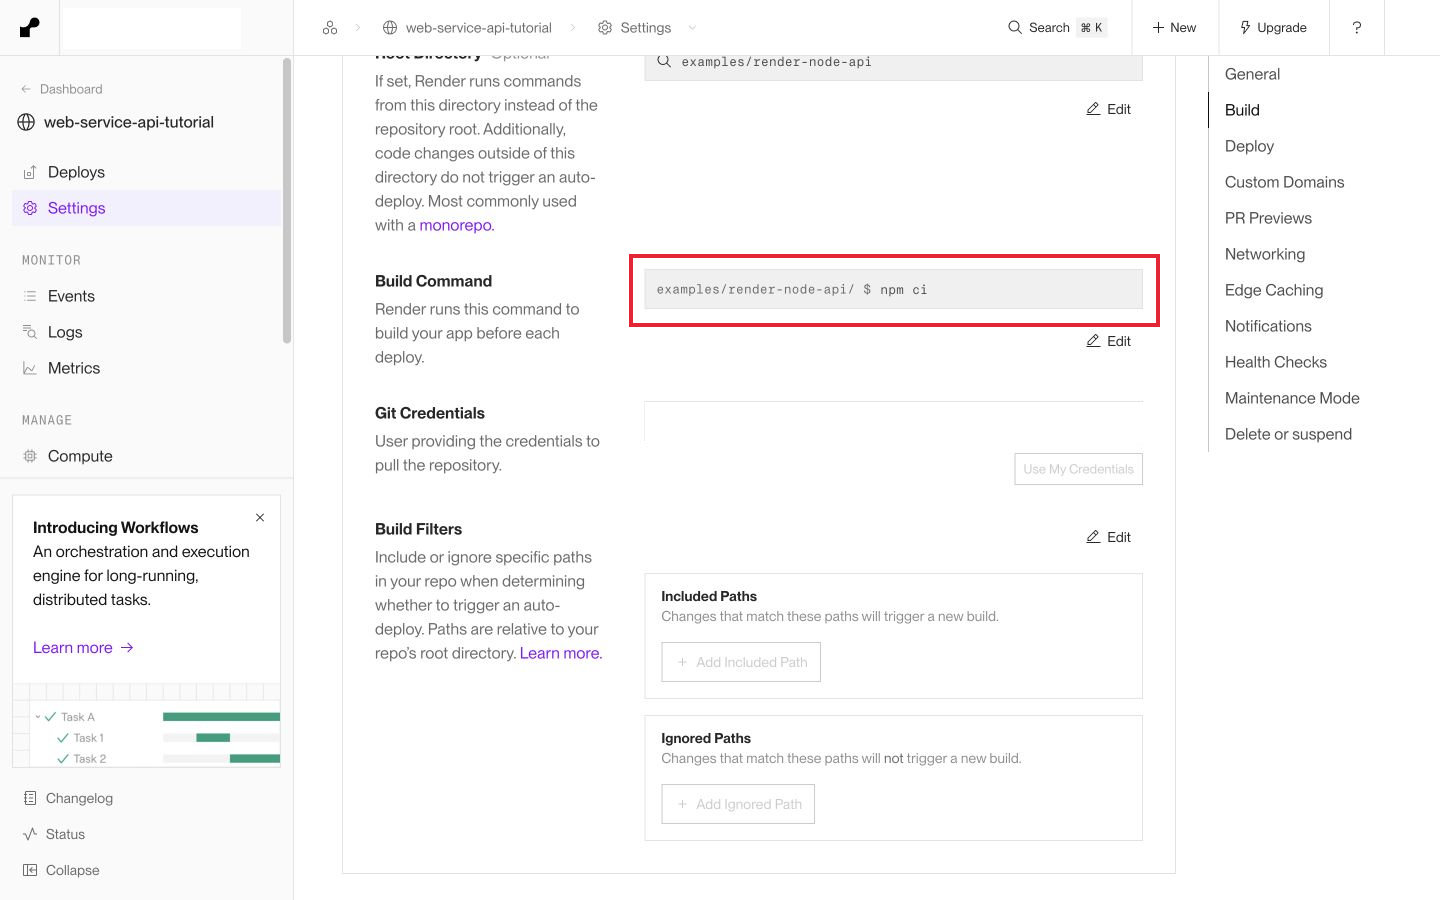
Under Settings, check that the build and start commands match the request:
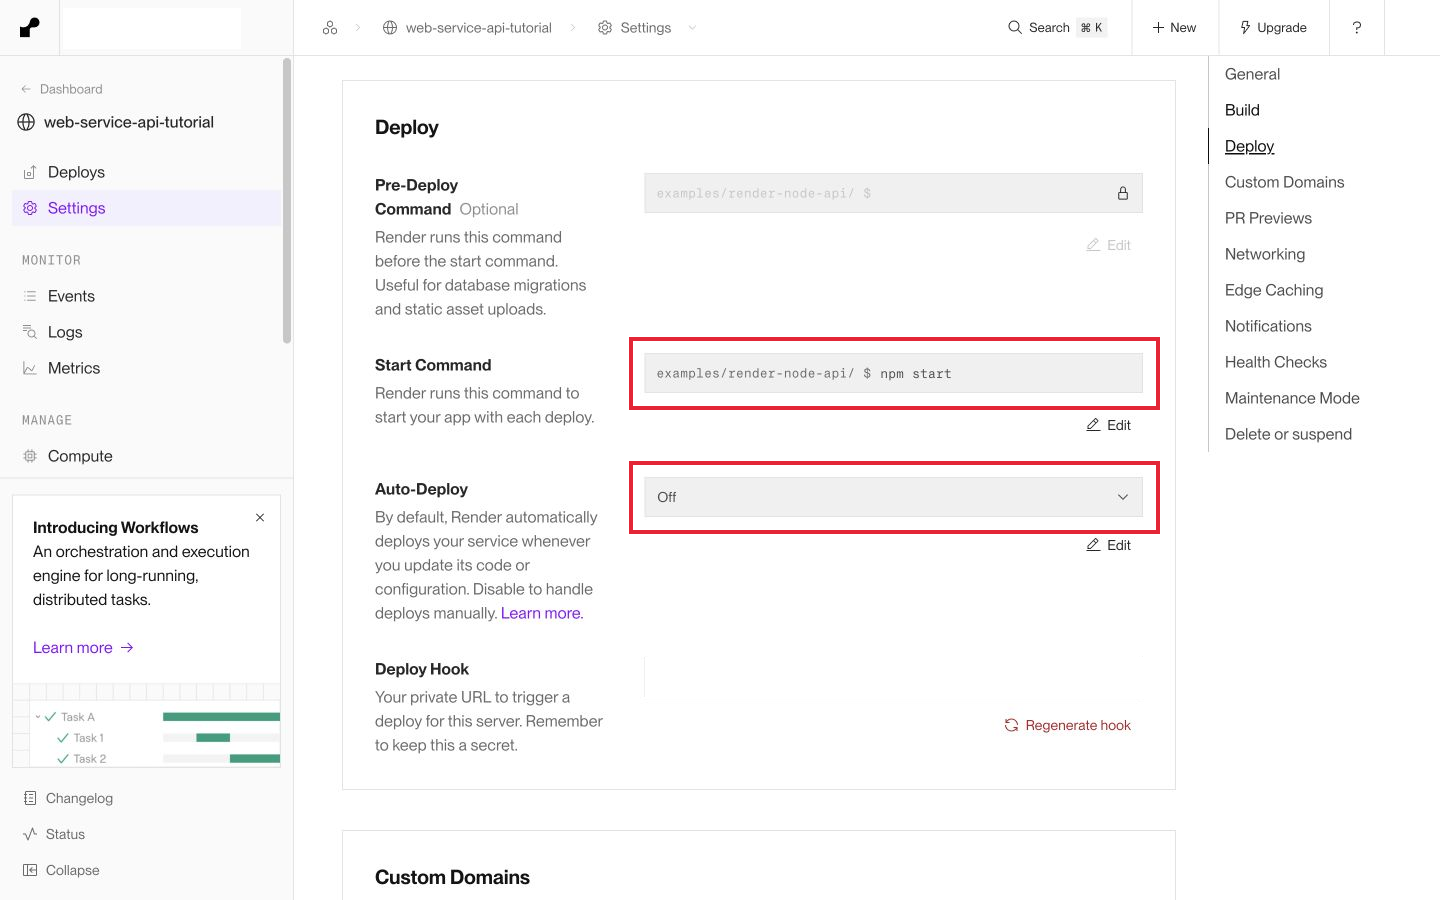
The start command is in the Deploy section. Auto-Deploy is off, matching our request:
Test the public URL
Once the deploy is live, check both routes:
curl --fail --silent --show-error "$SERVICE_URL/"
curl --fail --silent --show-error "$SERVICE_URL/healthz"
The first response should be:
{"message":"Hello from Node.js"}
The second should be:
{"status":"ok"}
I checked both routes on the deployed service. Render handles HTTPS for its public URL; our Node process listens on HTTP inside the service. A web service is publicly reachable, so add authentication before serving private application data.
If npm ci fails, check the lockfile and root directory. If the build passes but the deploy fails, check the start command, PORT, and the health route. The app needs to bind to 0.0.0.0, not only localhost.
Clean up the test service
If you are only following along, delete the tutorial service when you are done. Check the ID before running this command; it permanently removes that service:
printf 'Deleting tutorial service %s\n' "$SERVICE_ID"
curl --fail-with-body --silent --show-error \
  --request DELETE "https://api.render.com/v1/services/$SERVICE_ID" \
  --header "Authorization: Bearer $RENDER_API_KEY" \
  --write-out 'HTTP %{http_code}\n'
The delete endpoint returns 204 on success. I removed my test service after verifying the deploy. Remove the key from your shell when you finish:
unset RENDER_API_KEY
If you created a key just for this tutorial, revoke it in Account settings as well. Add the generated request and response JSON files to .gitignore; they contain your account and service details even though the bearer token is not in them.
That's it! Your script can create the service, keep its ID, and check the deploy before using the new API URL.