How to deploy MySQL on Render using Docker
In this tutorial, we are going to deploy MySQL on Render using Docker. We'll keep it on Render's private network and add a disk so the database files survive redeploys.
You'll need a Render account with billing enabled. Private services and persistent disks are paid resources, so review the dashboard's pricing before hitting deploy.
Create a private service
From the Render dashboard, hit New, then Private Service.
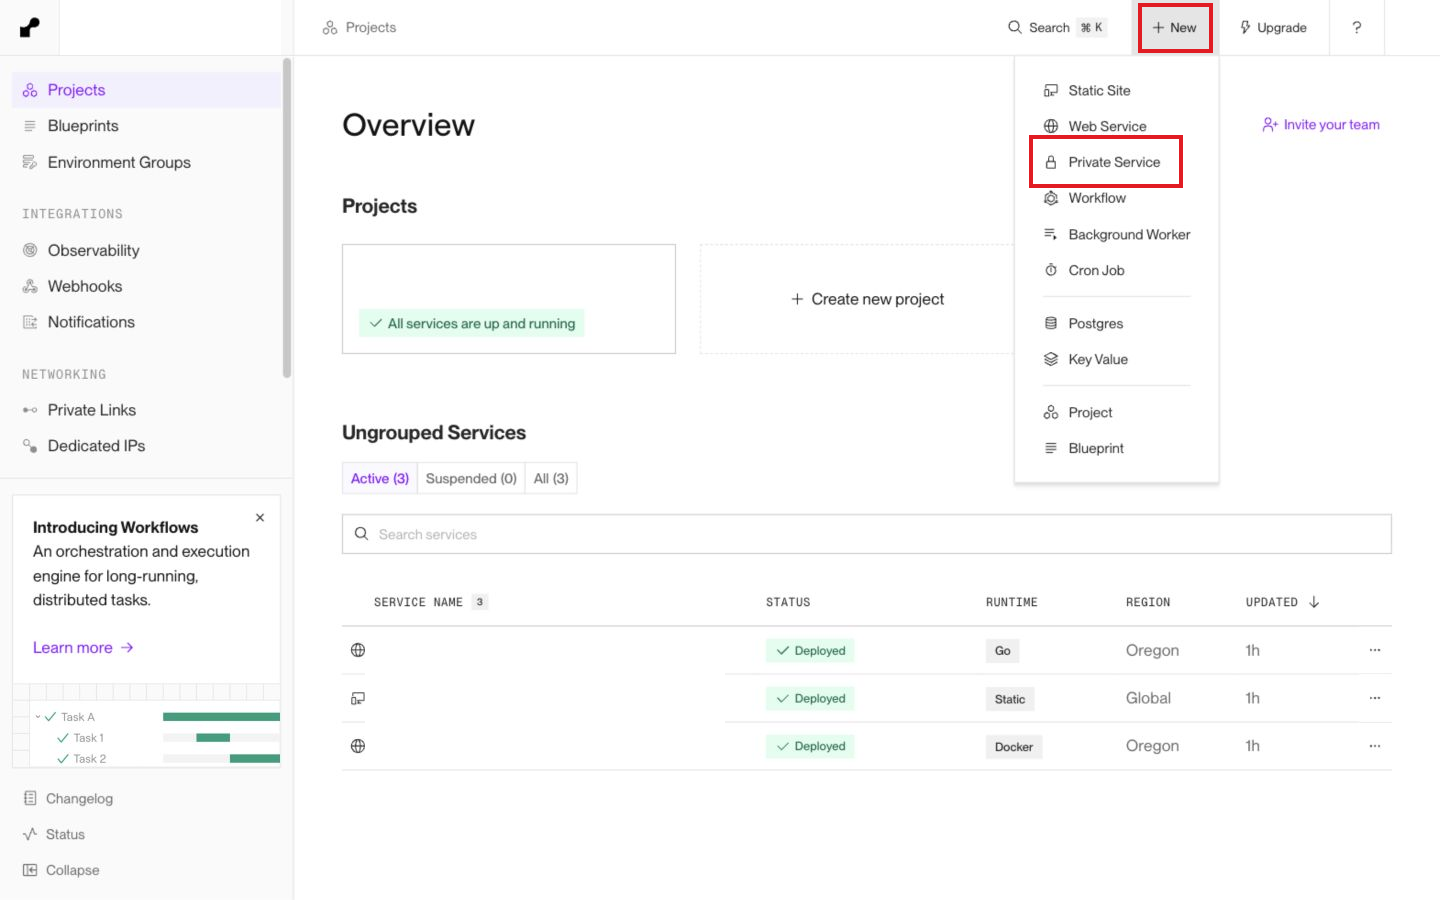
Select Existing Image and enter:
docker.io/library/mysql:8.4
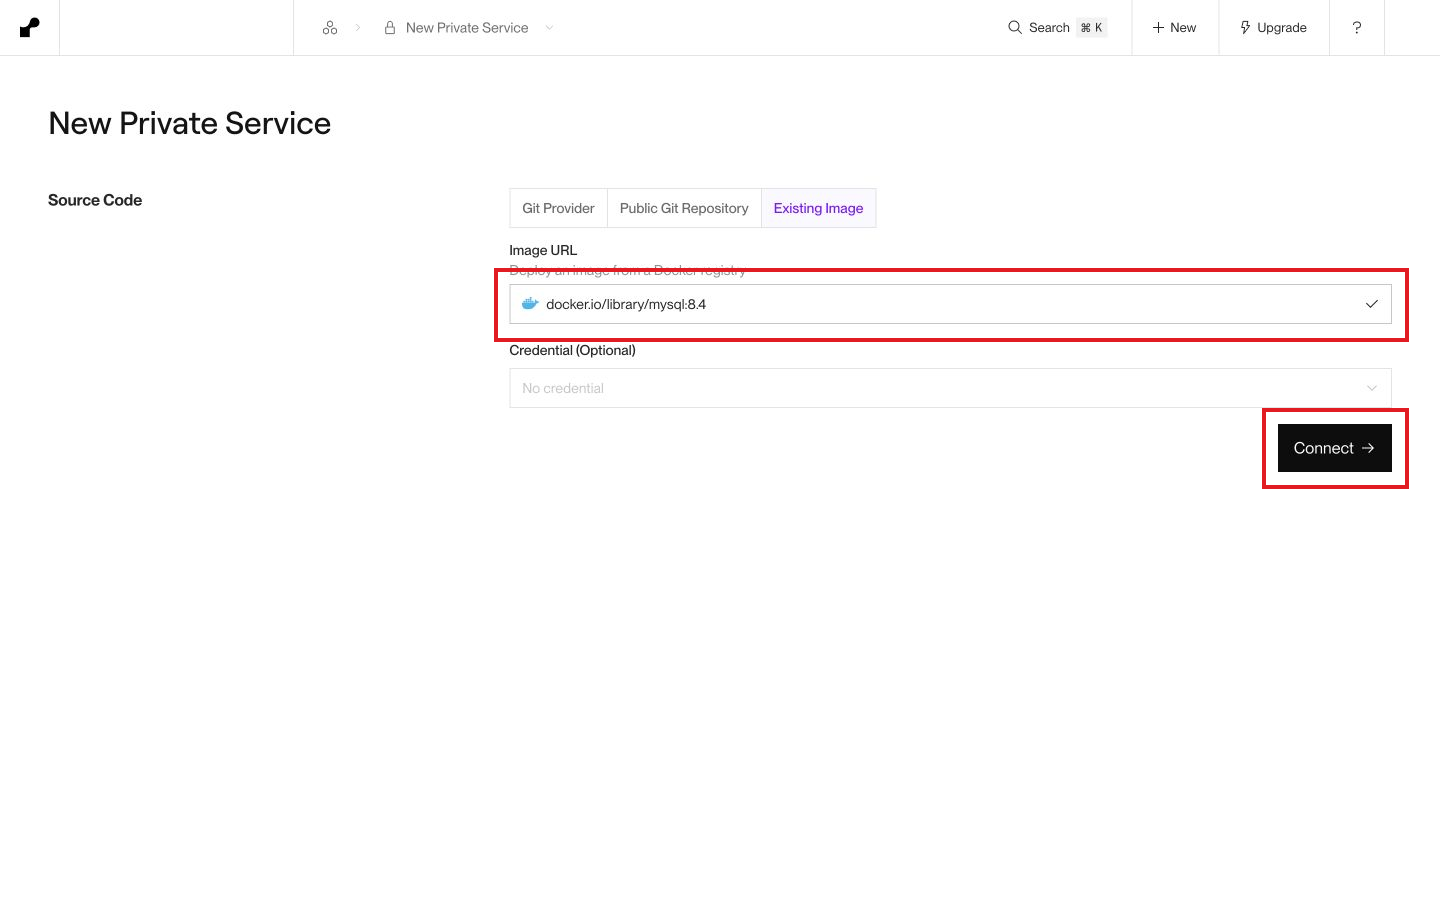
Hit Connect. This uses the official MySQL Docker image. If you'd rather keep the image selection in a GitHub repository, use this Dockerfile and choose the Docker runtime when connecting the repo:
FROM mysql:8.4
I used the 2 GB RAM compute option for this example. Choose memory for your workload; the lowest-priced option is not a guarantee that MySQL will have enough memory.
Name the service mysql-docker-tutorial, then select the same region as the application that will connect to it.
Add the database settings
Add the following environment variables:
| Key | Value |
|---|---|
MYSQL_DATABASE |
tutorial |
MYSQL_USER |
tutorial_app |
MYSQL_PASSWORD |
Generate a new password for the application user |
MYSQL_ROOT_PASSWORD |
Generate a different password for root |
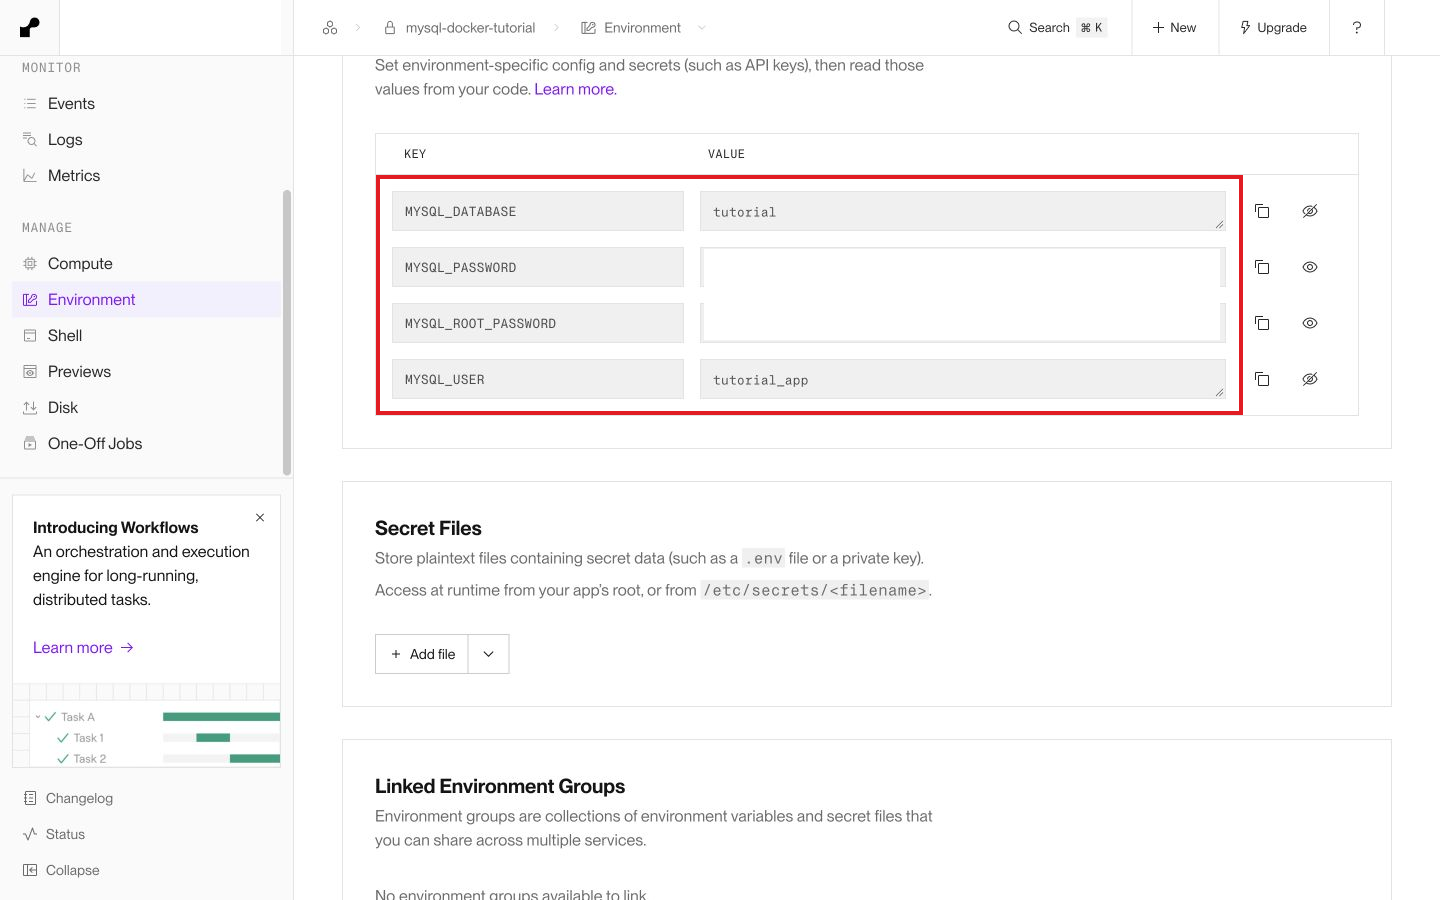
Use tutorial_app for your application's connection. Keep root for administration. Don't put either password in the Dockerfile or commit them to GitHub.
The image creates the database and user on its first start with an empty data directory. Updating these variables later won't update credentials that already exist in MySQL.
Next, open Advanced, hit Add disk, and set the mount path to:
/var/lib/mysql
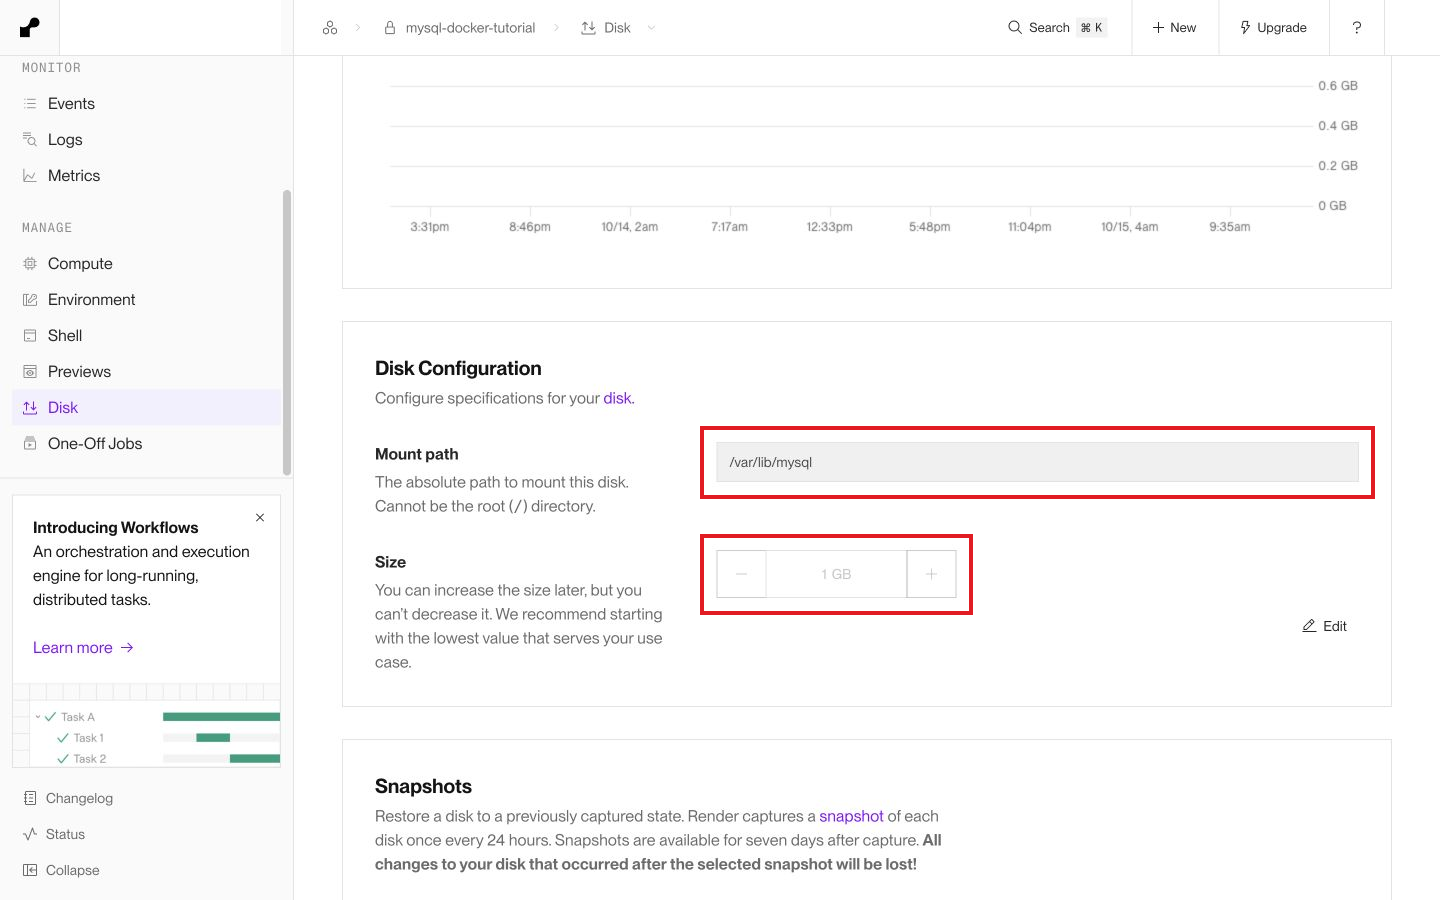
That path needs to match exactly. It's where MySQL writes its database files. Start with a disk size appropriate for your example, then review the compute and storage charges before hitting Deploy private service. Render's MySQL guide covers the same storage requirement.
Connect to MySQL
Once the service is live, open Shell and run:
mysql -h 127.0.0.1 -u "$MYSQL_USER" -p "$MYSQL_DATABASE"
Enter the application user's password when prompted. Using -p without the password keeps it out of the command itself.
Try creating a table and inserting a row:
CREATE TABLE tutorial_check (
    id INT PRIMARY KEY,
    message VARCHAR(255) NOT NULL
);
INSERT INTO tutorial_check VALUES (1, 'Hello from Render');
SELECT * FROM tutorial_check;
Exit with exit. Open Deploys, hit Manual Deploy, and choose Restart service. Once it is live again, connect through Shell and repeat SELECT * FROM tutorial_check;. The row should still be there. I checked this on the example service, and the row survived.
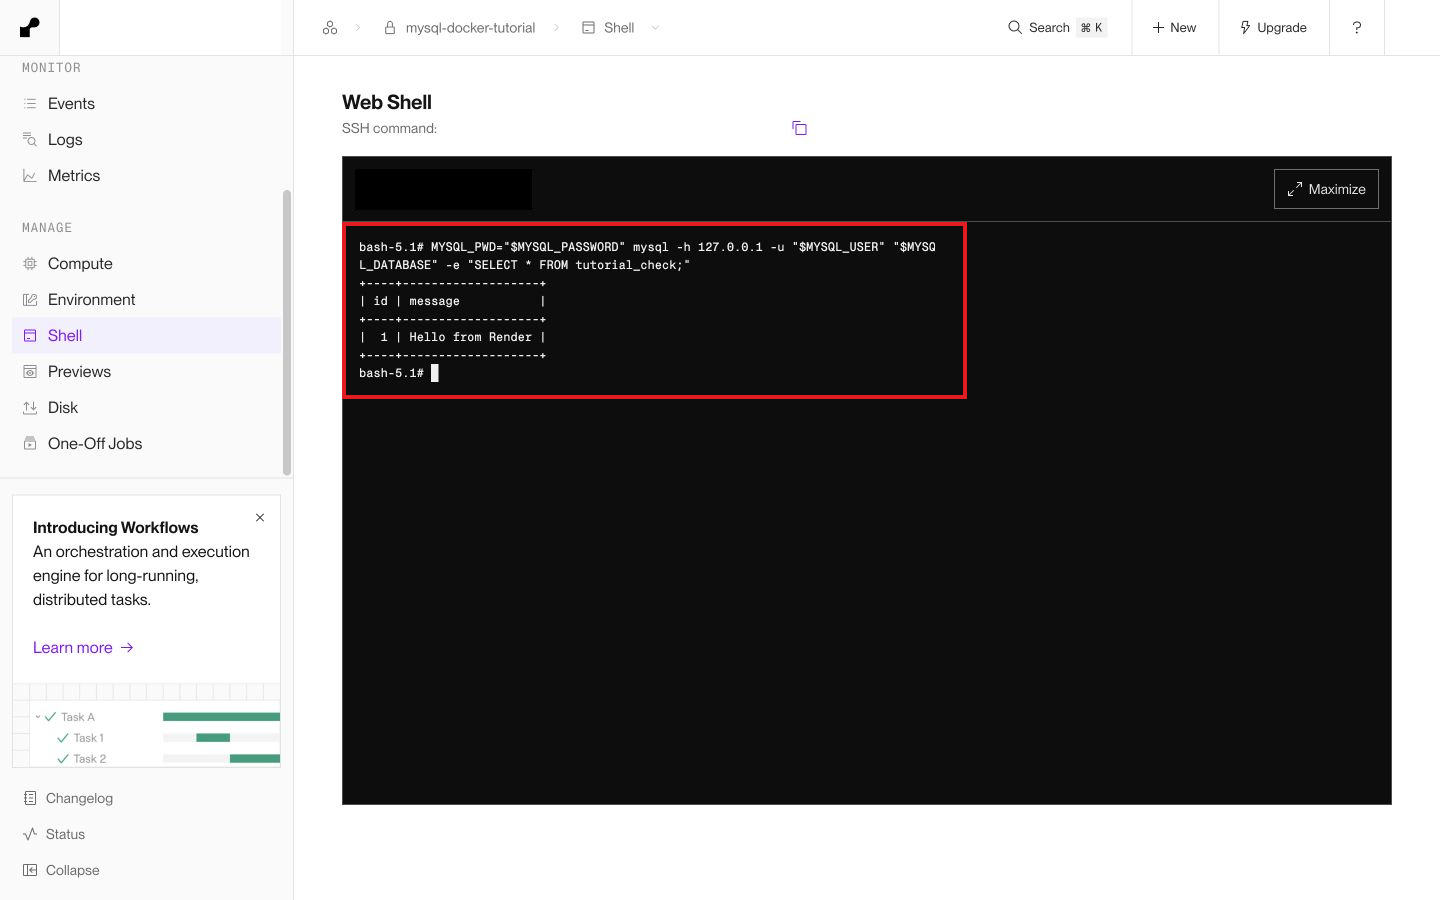
The screenshot uses MYSQL_PWD="$MYSQL_PASSWORD" for that one shell command so no password value appears in the terminal. For your interactive session, use the -p prompt shown above.
For another Render application, use the internal hostname from this service's dashboard, port 3306, and the application user's credentials. Both services need to be in the same workspace and region. A private service doesn't expose MySQL directly to the internet.
Back up the database
Use mysqldump or another MySQL-aware backup tool, store backups outside this service, and test a restore. Render advises against using disk snapshot restores to recover a custom database because the restored database can be inconsistent.
Keep an eye on memory and disk usage as your data grows. A small tutorial plan isn't a sizing recommendation for production.
That's it! You have the steps to run MySQL as a Docker private service on Render and connect it to an application in the same region.