How to deploy PostgreSQL on Render using Docker
In this tutorial, we are going to deploy a PostgreSQL database on Render using Docker. We'll add persistent storage, connect to the database, and check that our data survives a restart.
Before we start, I would use Render's managed Postgres service for most projects. It saves you from running the database container yourself and offers features such as recovery and high availability depending on the plan. Use the Docker approach when you specifically need control over the container and are comfortable managing backups and upgrades.
You'll need a Render account with billing enabled. This setup uses a paid private service and a persistent disk. Check the price shown in your dashboard before deploying.
Create a private service
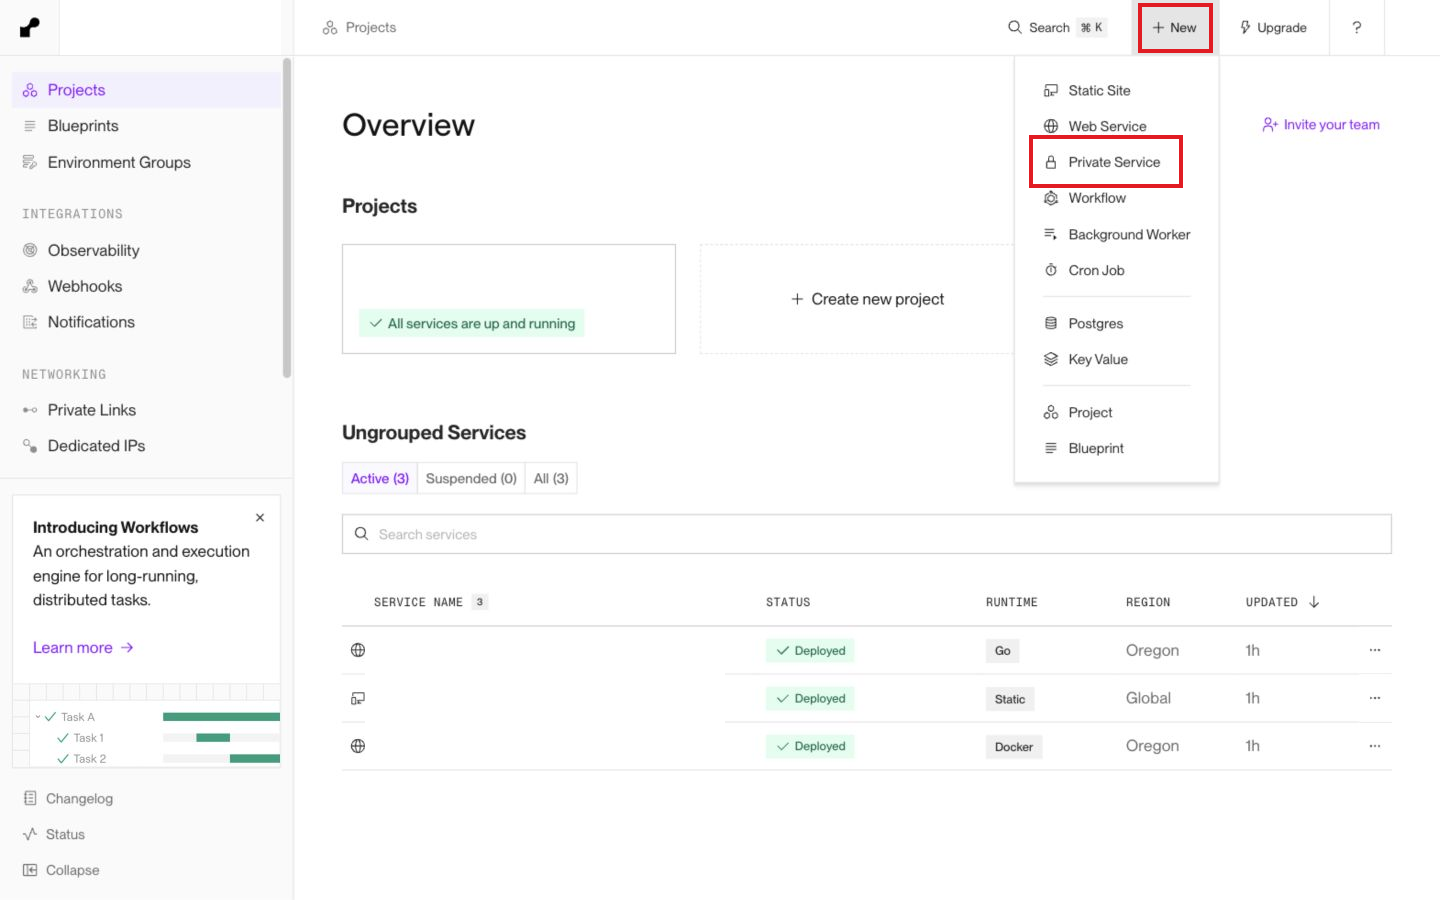
Open your Render dashboard, hit New, then Private Service.
Select Existing Image and enter:
docker.io/library/postgres:17
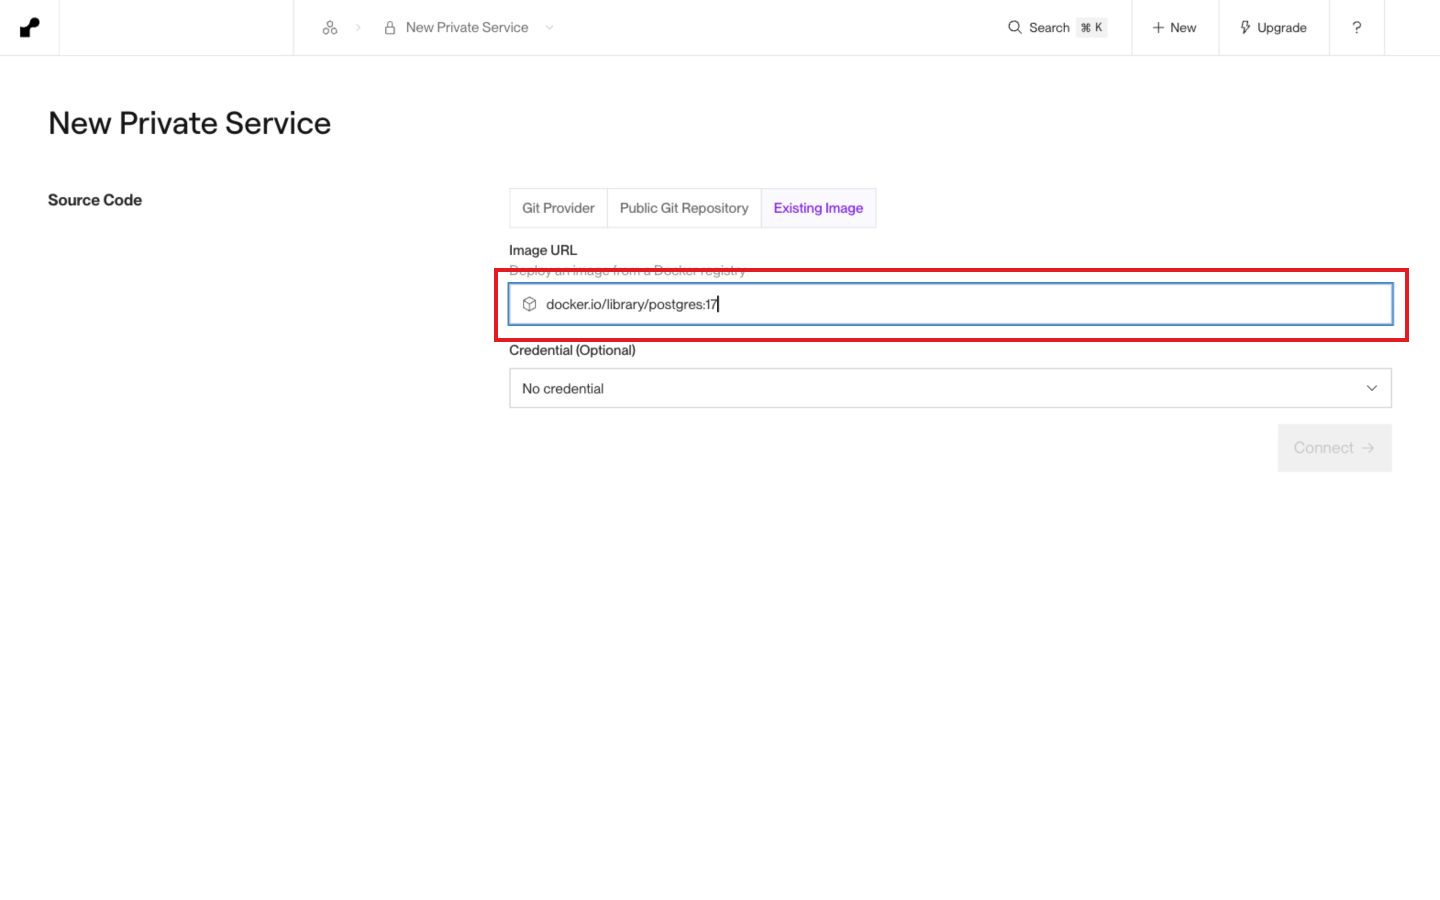
Hit Connect. We're using the official PostgreSQL Docker image, so there isn't a Dockerfile to push first. If you prefer deploying from GitHub, the equivalent Dockerfile is:
FROM postgres:17
Give the service a name, such as postgres-docker-tutorial. Pick the same region as the Render application that will connect to it.
Configure PostgreSQL
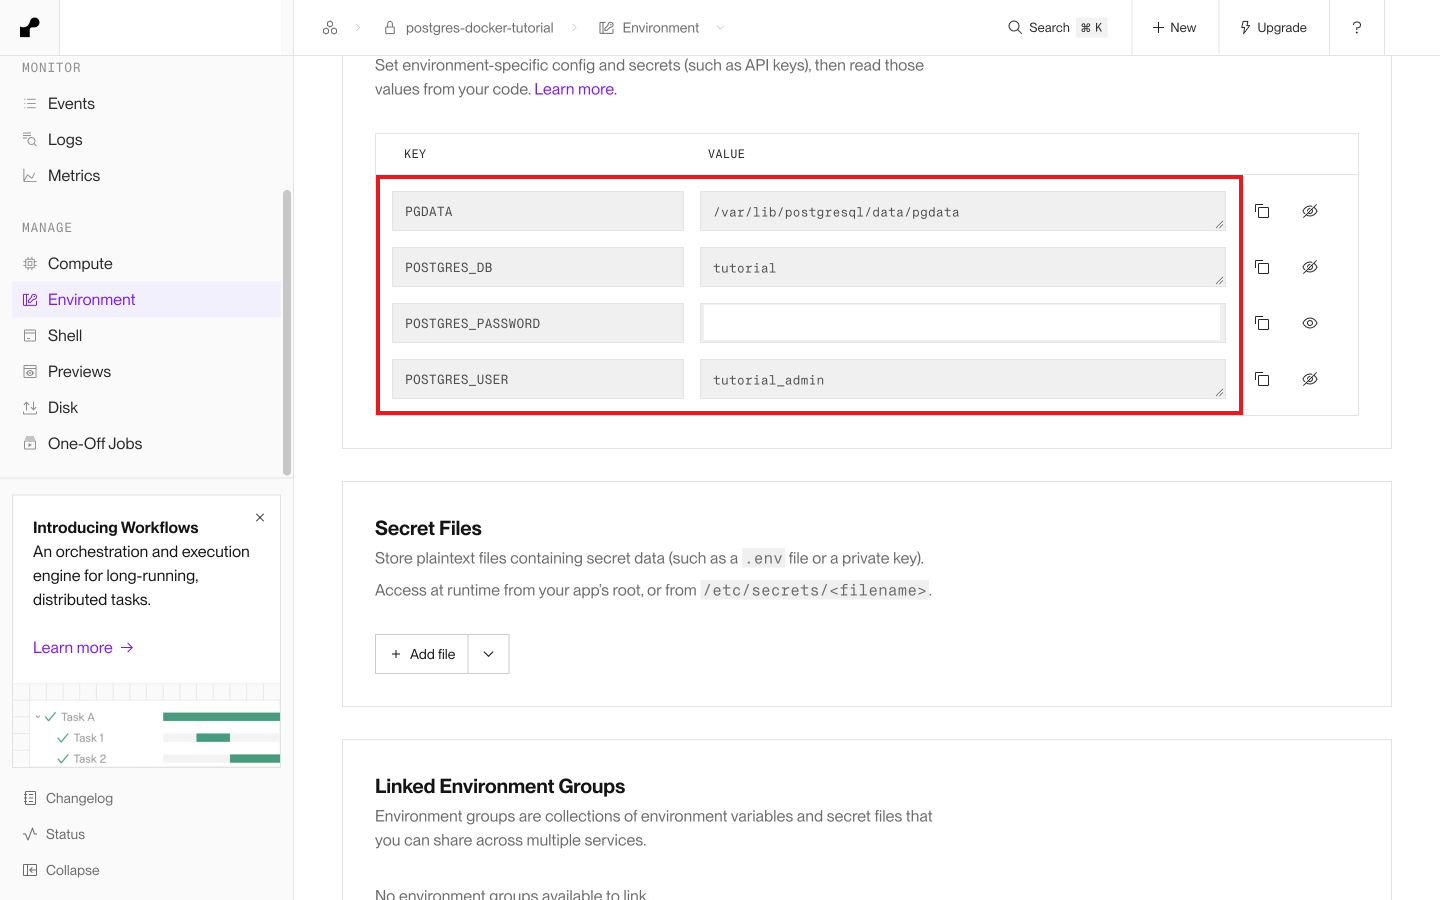
Add these environment variables:
| Key | Value |
|---|---|
POSTGRES_DB |
tutorial |
POSTGRES_USER |
tutorial_admin |
POSTGRES_PASSWORD |
Hit Generate for a new password |
PGDATA |
/var/lib/postgresql/data/pgdata |
POSTGRES_USER creates a superuser. Use it for this tutorial's setup, then create a separate role with only the permissions your application needs. Keep the password out of your Dockerfile and GitHub repository. These initialization settings apply when the data directory is empty; changing the environment variable later does not rotate an existing database password.
Next, open Advanced, hit Add disk, and use /var/lib/postgresql/data as the mount path. A 1 GB disk is enough for this small example; choose storage and compute for your actual workload.
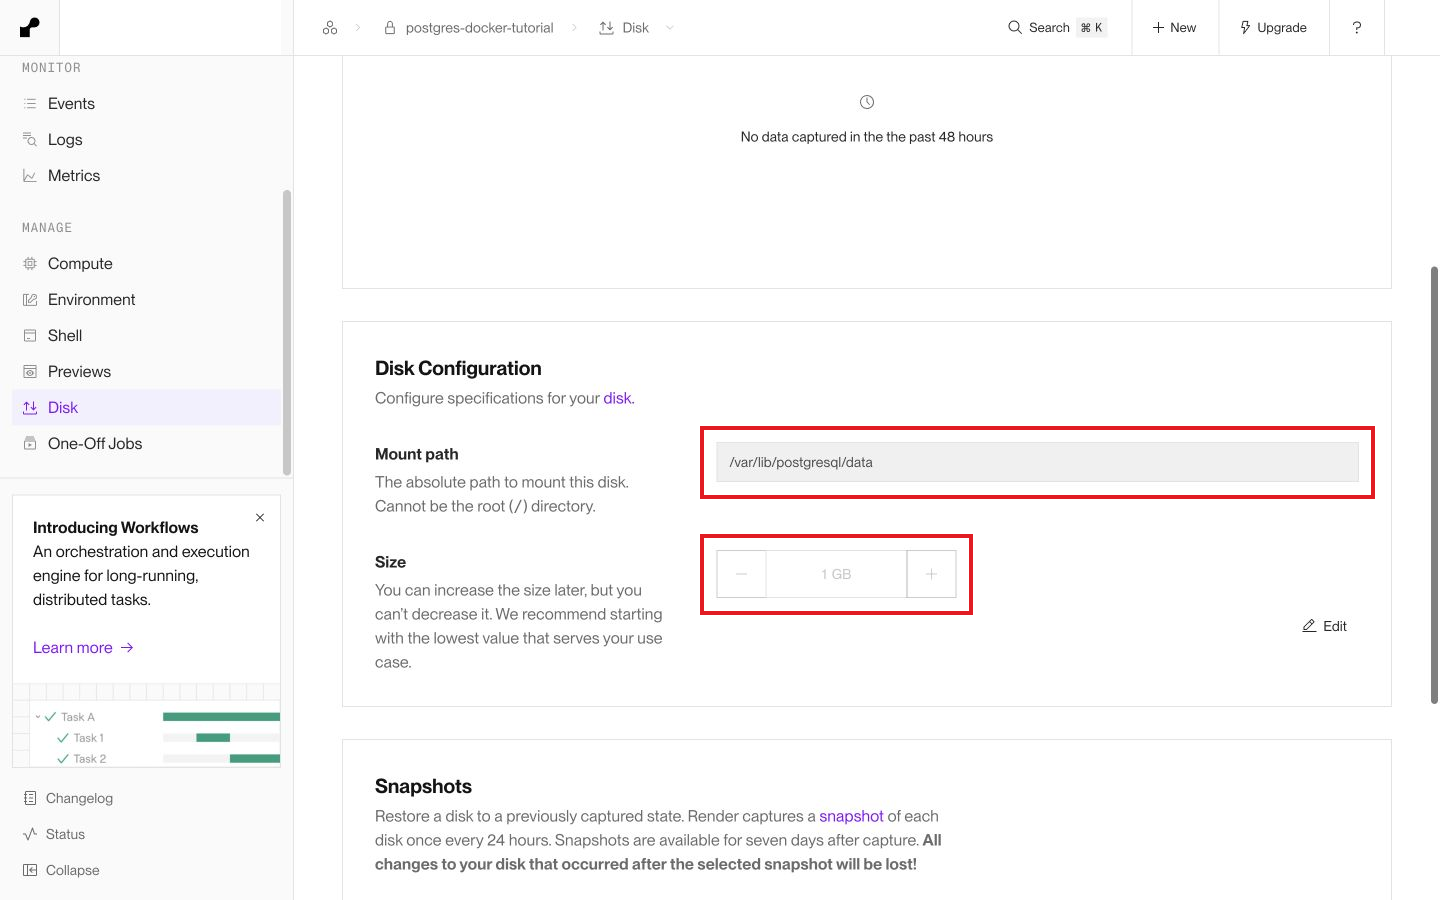
The pgdata subdirectory keeps the database files below the disk's mount point. These paths are for PostgreSQL 17. Check the image documentation before switching major versions: the official image uses a different layout starting with PostgreSQL 18.
Review the settings and hit Deploy private service.
Connect and try a query
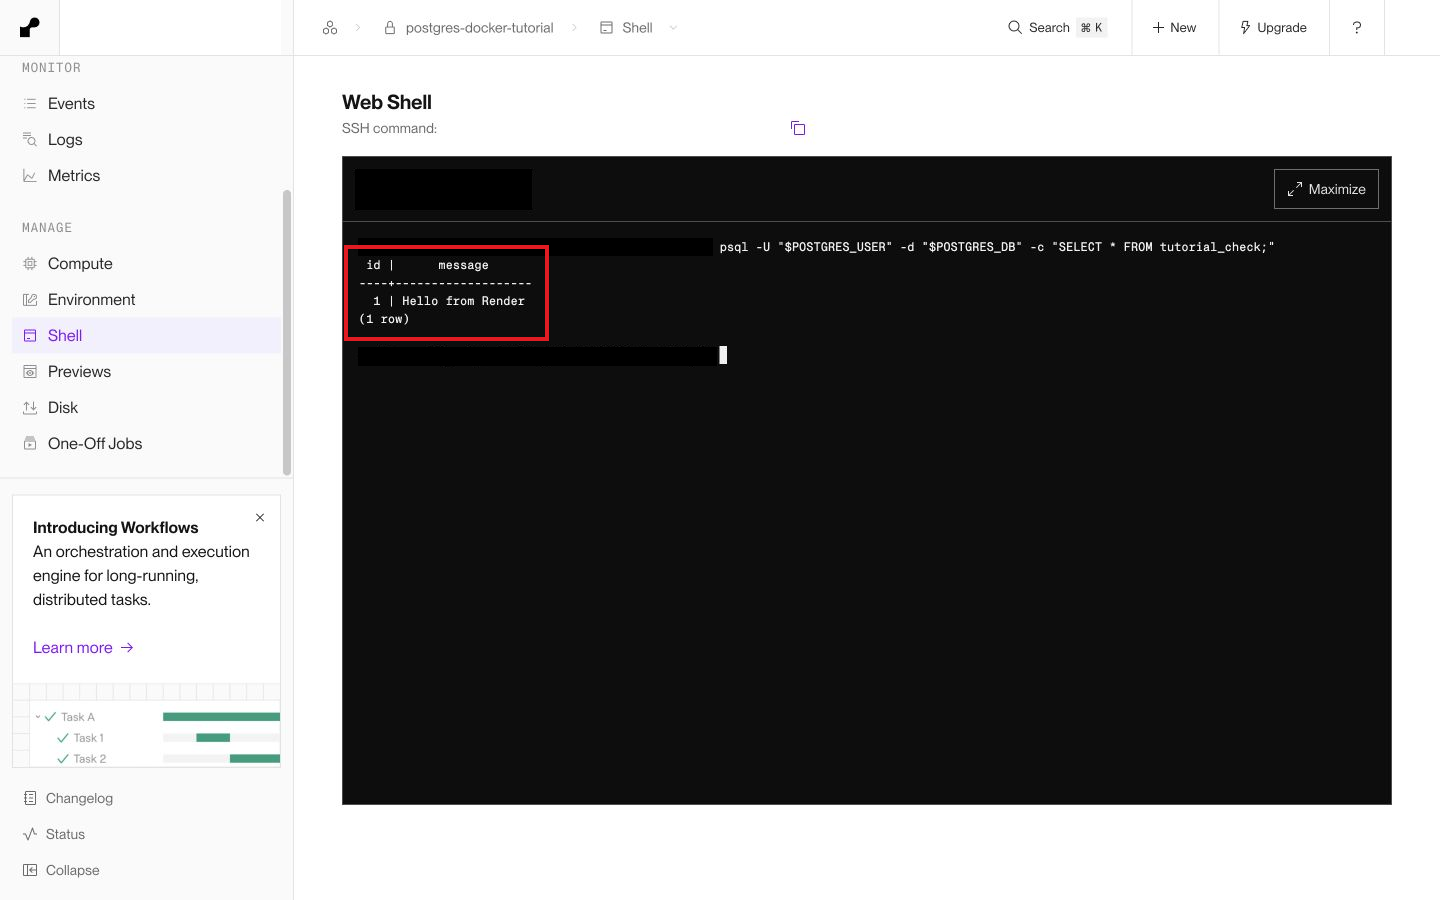
Once the deploy is live, open the service's Shell and run:
psql -U "$POSTGRES_USER" -d "$POSTGRES_DB"
Then run:
CREATE TABLE tutorial_check (
    id integer PRIMARY KEY,
    message text NOT NULL
);
INSERT INTO tutorial_check VALUES (1, 'Hello from Render');
SELECT * FROM tutorial_check;
Exit with \q. Open Deploys, hit Manual Deploy, and choose Restart service. Once it is live again, reconnect through Shell and run SELECT * FROM tutorial_check;. Your row should still be there. I ran this check on the example service, and the row survived the restart.
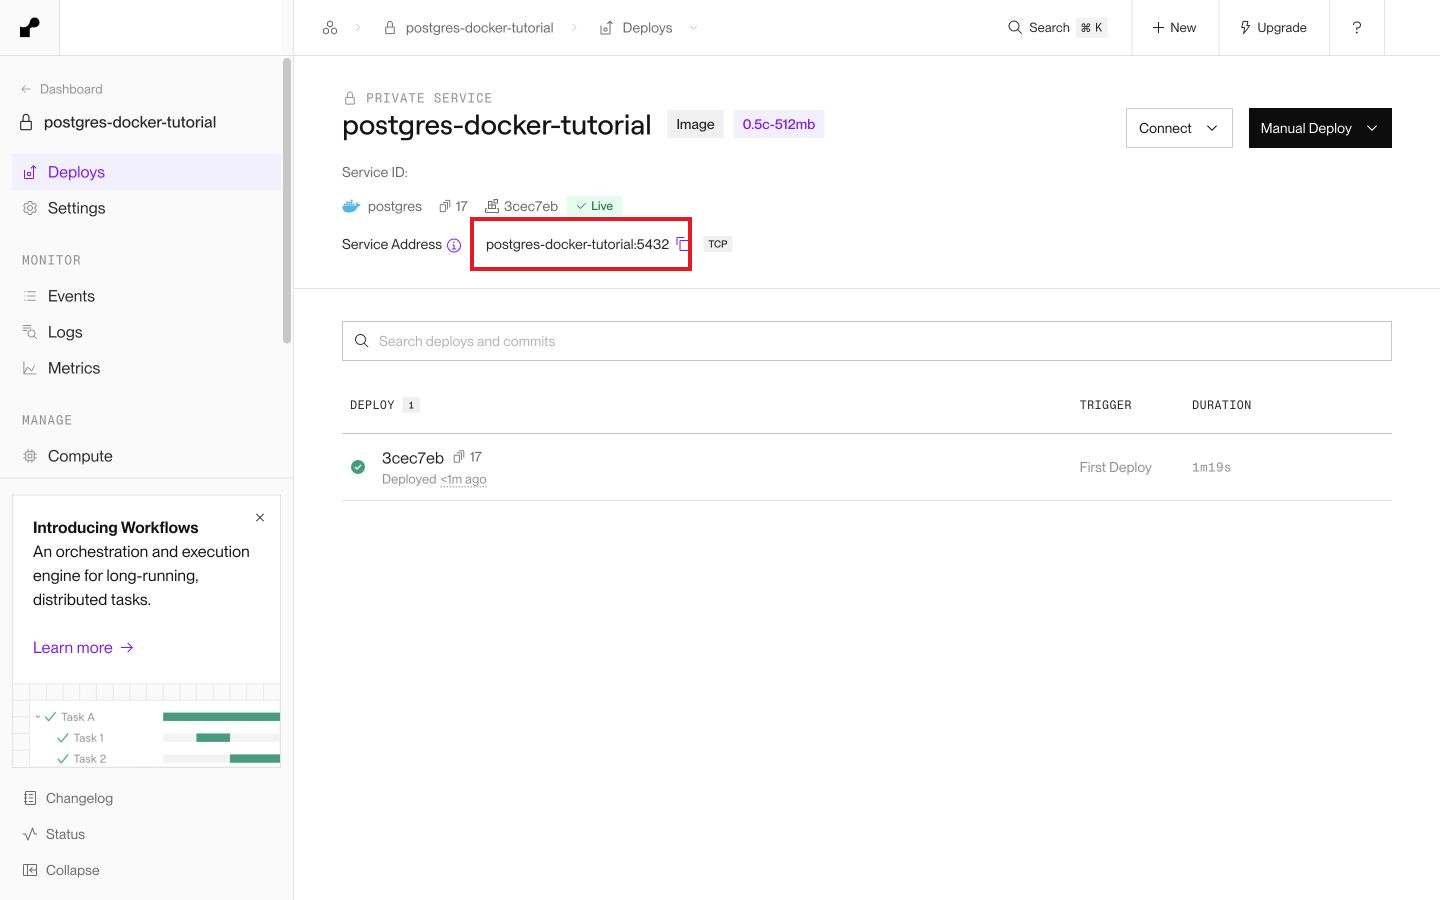
To connect from another Render service, use the internal hostname shown in your dashboard, port 5432, and your database credentials. The application must be in the same workspace and region. That private hostname won't resolve from your laptop. See Render's private network documentation for the connection rules.
Before using this for a project
Keep regular pg_dump backups outside this service and test restoring them. A disk keeps files across deploys, but it isn't a complete database backup strategy. Plan upgrades separately; changing a major image tag is not a database migration.
That's it! You have the configuration for PostgreSQL running as a Docker private service on Render. For an application where you just want a database that is managed for you, start with Render Postgres.