How to deploy a Python API on Render
In this tutorial, we are going to deploy a small Python API to Render. We'll write a couple of JSON endpoints, connect the GitHub repository, and test the deployed API over HTTPS.
I am using a Free web service for this example. It is enough to follow along, but it spins down when idle and has usage limits. Check Render's current Free plan limits before using it for a project that needs to stay available.
Create the API
You will need Python 3.13, GitHub, and a Render account. Create a GitHub repository and clone it to your computer. We will use Flask for the routes and Gunicorn to run the app on Render.
Create app.py:
from flask import Flask, jsonify

app = Flask(__name__)


@app.get("/")
def index():
    return jsonify(message="Hello from Python")


@app.get("/healthz")
def health():
    return jsonify(status="ok")
Create requirements.txt:
Flask==3.1.2
gunicorn==23.0.0
Add a .python-version file containing:
3.13
Render supports leaving off the patch version in this file, so it will use a current patch release of Python 3.13. You can read about the other options in Render's Python version docs.
Create a virtual environment and install the dependencies:
python3 -m venv .venv
source .venv/bin/activate
python -m pip install -r requirements.txt
flask --app app run --port 10000
On Windows, activate the environment with .venv\Scripts\activate. The Flask command above is for local development. We will use Gunicorn on Render.
In another terminal, check the routes:
curl http://localhost:10000/
curl http://localhost:10000/healthz
Commit app.py, requirements.txt, and .python-version, then push them to GitHub. Add .venv/, __pycache__/, and .env to .gitignore.
Create a web service
Open your Render dashboard, hit New, then Web Service.
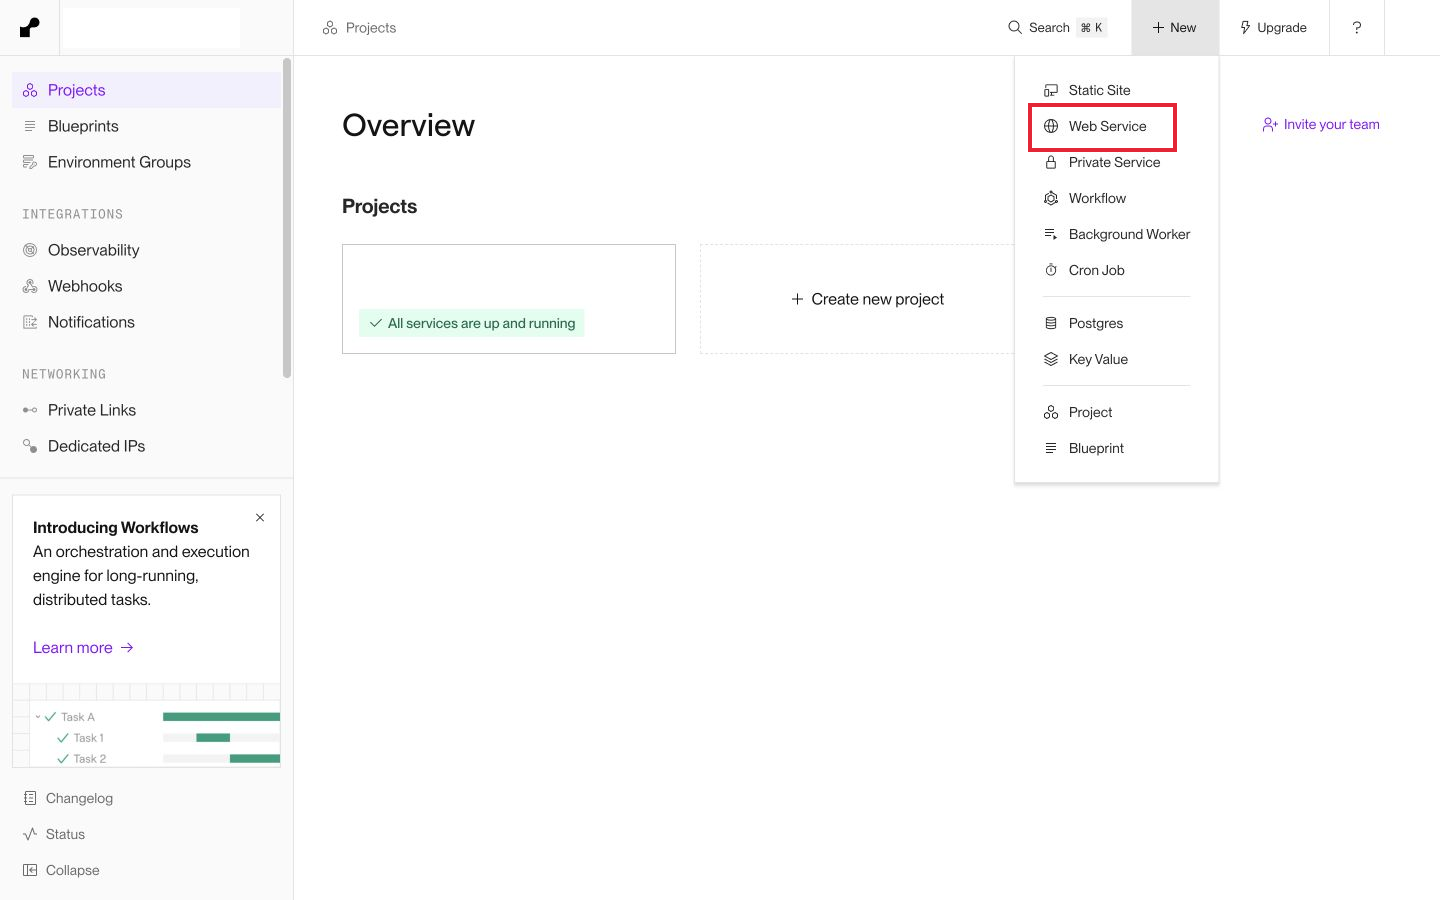
Choose Git Provider and select your repository. If GitHub is not connected yet, follow Render's connection flow and give it access to the repository you want to deploy.
Give the service a name, such as python-api-tutorial. Set Language to Python 3, choose your branch, and pick a region. I am using Oregon.
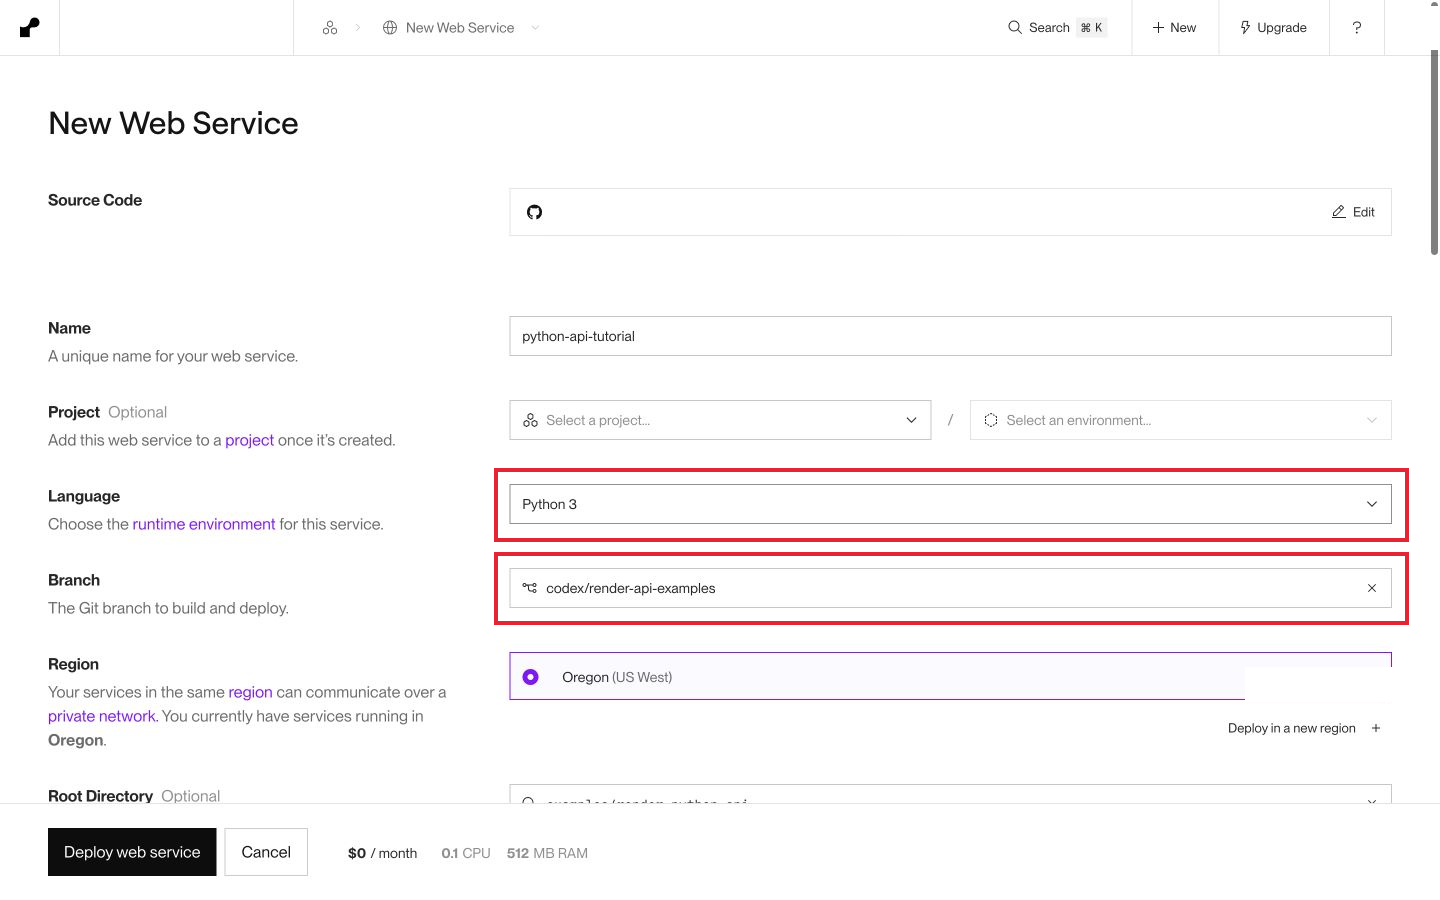
If you copied these files into the root of a new repository, leave Root Directory empty. My screenshot uses examples/render-python-api because the example lives inside a larger repository, on the codex/render-api-examples branch. Use the directory and branch that contain your own files.
Set the build and start commands
Use the following settings:
| Setting | Value |
|---|---|
| Language | Python 3 |
| Build Command | pip install -r requirements.txt |
| Start Command | gunicorn app:app --bind 0.0.0.0:$PORT |
| Compute | Free for this example |
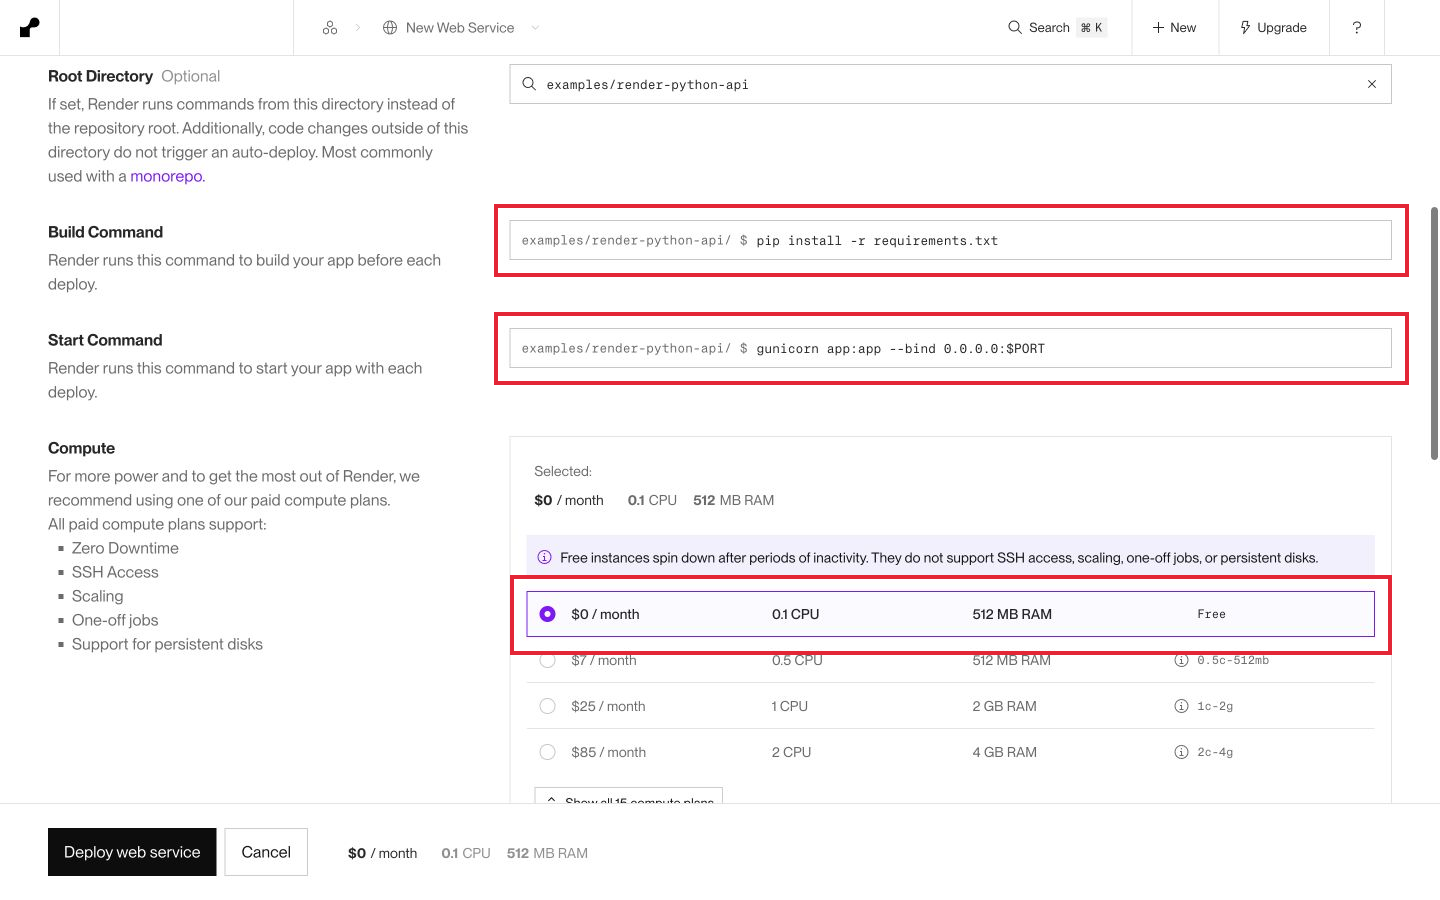
In app:app, the first app means the app.py module. The second is the Flask application variable inside it. Gunicorn imports that object and serves requests. The bind option listens on every interface at the PORT supplied by Render. This follows the same approach as Render's Flask quickstart.
Open Advanced and set Health Check Path to /healthz.
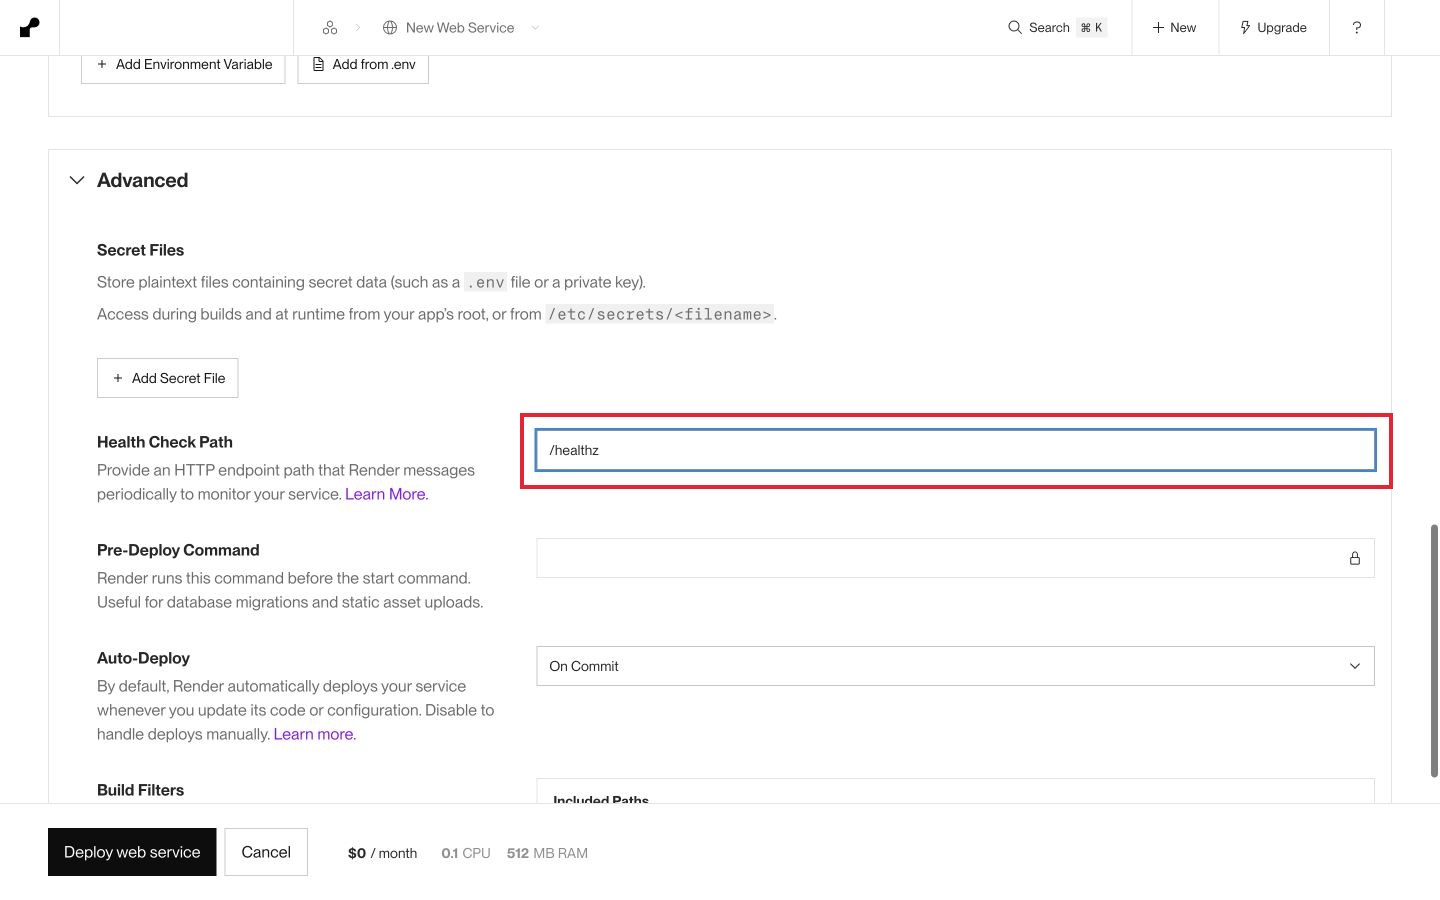
Our example does not need an API key or database password. If your app does, add those values under Environment Variables, rather than putting them in the repository. Review the settings and hit Deploy web service.
Test the deployed API
Wait for the deploy to show Live, then open the onrender.com URL shown on the service page. Your URL will be different from mine.
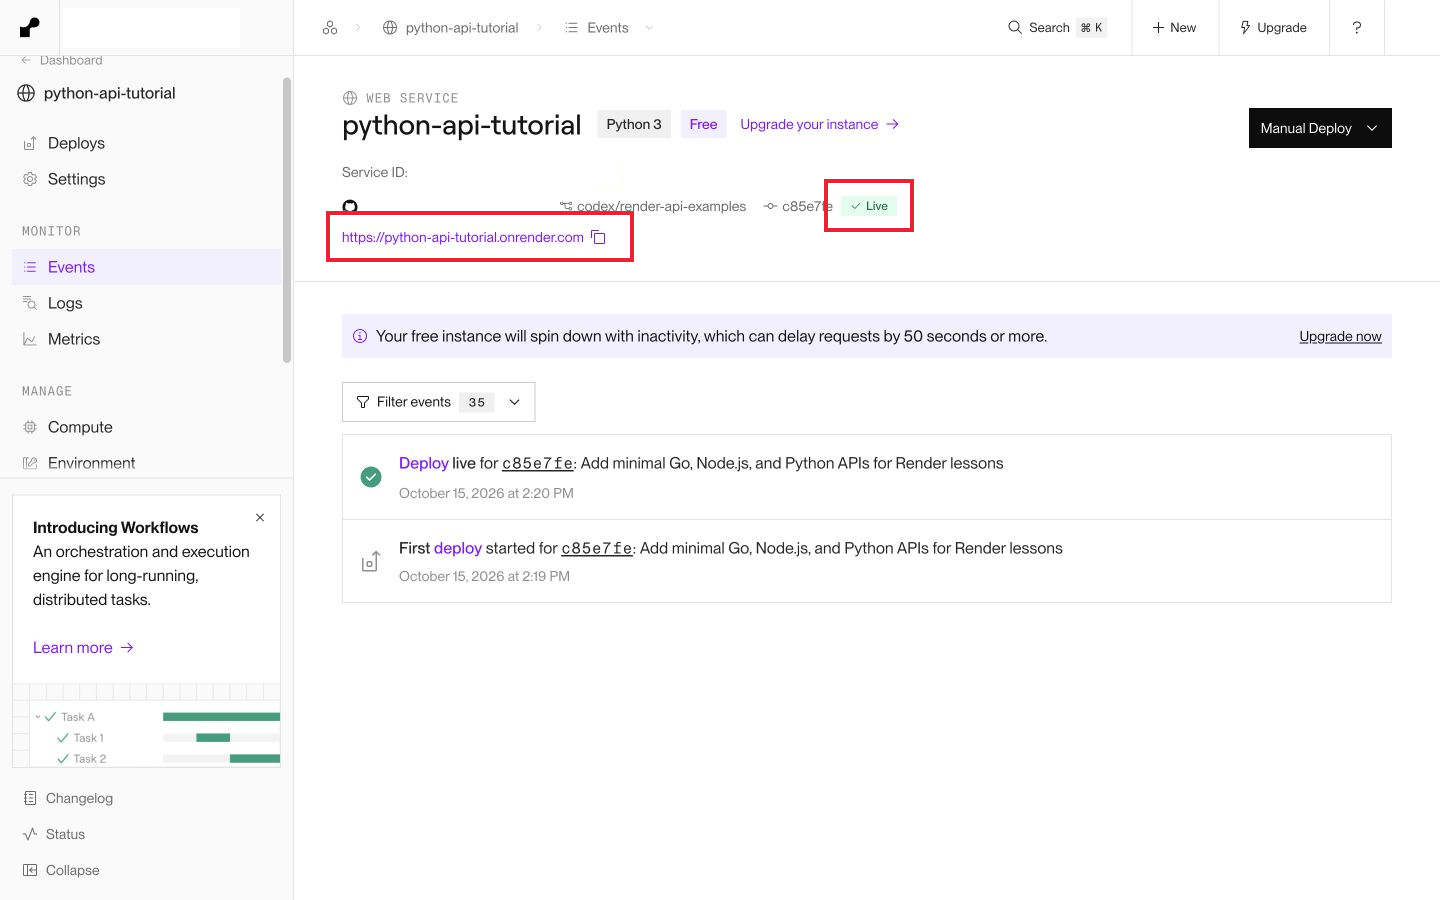
The root route should return:
{"message":"Hello from Python"}
Add /healthz to that URL. You should get:
{"status":"ok"}
You can also use curl. Replace the placeholder URL with the one from your dashboard:
curl https://YOUR-SERVICE.onrender.com/
curl https://YOUR-SERVICE.onrender.com/healthz
I checked both routes on the deployed example. Render provides HTTPS for the public URL. Your app listens on HTTP inside the service, so you do not need to set up a certificate in this code.
If the deploy fails
If Gunicorn says it cannot find app, check the filename, Flask variable name, and Root Directory. If an import fails, check requirements.txt and the installation output. Open the failed deploy to see the complete logs.
If Render cannot detect an open port, check that the app binds to 0.0.0.0 and uses PORT. Binding only to localhost can work on your computer and fail in a hosted service.
A Free service can take longer to answer after it has been idle. Its filesystem is temporary, so use a database or object storage for data you need to keep. The tutorial API does not store any data.
That's it! You have a Python API running on Render. When you push another change to the connected branch, Render can build and deploy it automatically. Before adding private application data, add the authentication your endpoints need; a web service's URL is public.